
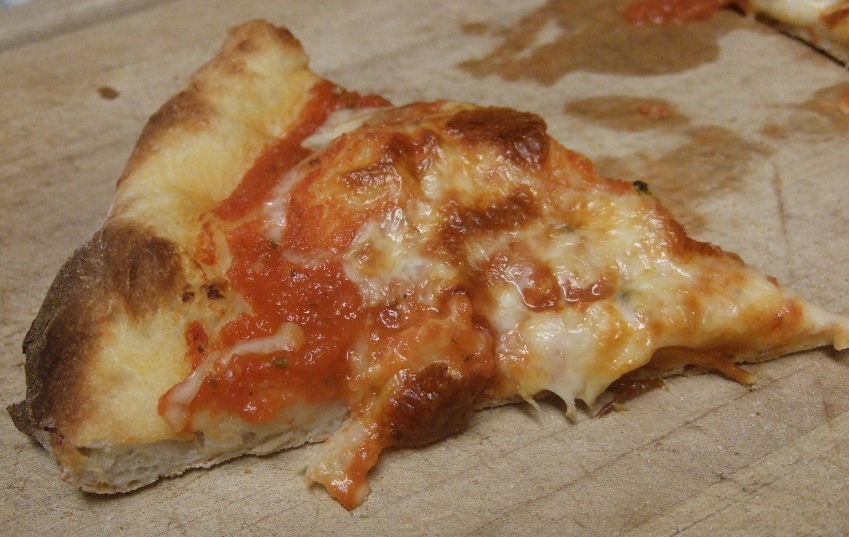
This has been my go-to pizza recipe for the last few years. A while back, CoC suggested I share it, so here it finally is. It has the best crust of any pizza I've made.
The sauce is quick and delicious—enough flavor to make it interesting but not so spicy that the jalapeno has a problem with it. Given my current dairy-free existence, I offer you options with or without cheese. The veggie-only version is surprisingly tasty—even the jalapeno approved.
The dough does use a food processor, but that makes super-easy even for a total baking novice. You'll want to get the dough started at least 24 hours ahead of time—it's more flavorful and also easier to work with after a day of rest. A pizza stone and baking peel aren't absolutely essential, but they do help. The trickiest step is undoubtedly sliding the pizza from the baking peel to the stone. The peel needs to be well floured, and you need to jerk it out fairly quickly.
adapted from Cook's Illustrated Jan/Feb 2011
Dough
3 cups (16.5 oz) bread flour, plus more for work surface
2 teaspoons sugar
1/2 teaspoon instant or rapid-rise yeast (not active dry)
1 1/3 cups (about 10.5 oz) ice water
1 tablespoon vegetable oil, plus more for work surface
1 1/2 teaspoons table salt
semolina flour (optional)
Sauce
1 28-oz can whole peeled tomatoes, drained and liquid discarded
1 tablespoon olive oil
1 teaspoon red wine vinegar
2 med. garlic cloves, minced or pressed through garlic press
1 teaspoon table salt
1 teaspoon dried oregano
1/4 teaspoon ground black pepper
Cheese (for 2 pizzas)
1 oz. finely grated Parmesan cheese (about 1/2 cup)
8 oz. shredded whole-milk mozzarella (about 2 cups)
Vegetables (for 1 pizza; quantities are approximate)
1 cup chopped mushrooms
1 cup chopped broccoli
1 cup grape tomatoes, halved
olive oil
table salt
ground black pepper
1. For the dough: In a food processor fitted with metal blade, process flour, sugar, and yeast until combined, about 2 seconds. With machine running, slowly add water through feed tube; process until dough is just combined and no dry flour remains, about 10 seconds. Let dough stand for 10 minutes.
2. Add oil and salt to dough and process until dough forms satiny, sticky ball that clears sides of work bowl, 30 to 60 seconds. Remove dough from bowl, knead briefly on lightly oiled countertop until smooth, about 1 minute. Shape dough into tight ball and place in large, lightly oiled bowl. (I spray a little oil into the bowl and then spray a little oil on top of the dough after it's in there.) Cover top of bowl tightly with plastic wrap and refrigerate for at least 24 hours and up to 3 days.
3. For the sauce: Process all ingredients in food processor until smooth, about 30 seconds. Transfer to medium bowl or container and refrigerate until ready to use. (Or make sauce right before making pizza, in which case there's no need to refrigerate it.)
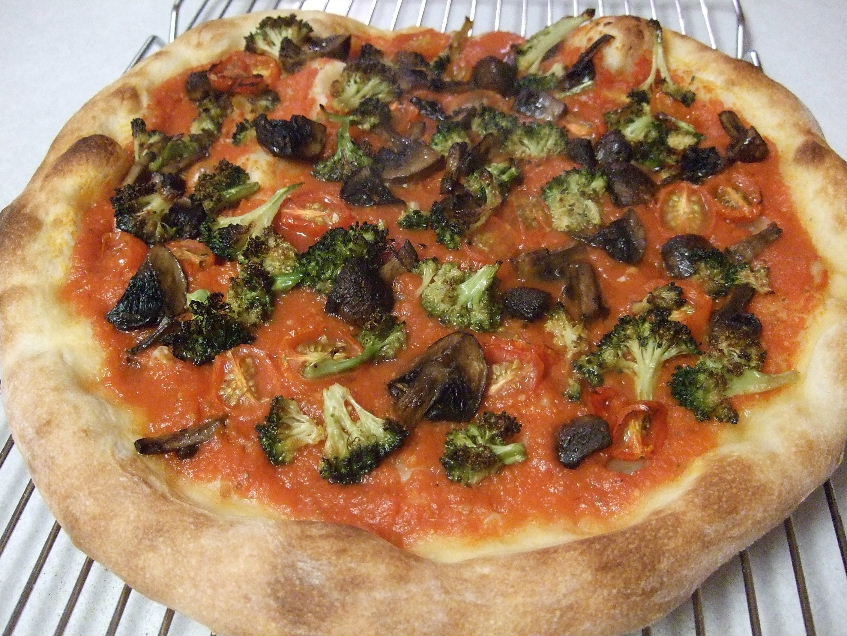
4. For the vegetables: Preheat oven to 400°F. Toss veggies with salt, pepper, and a moderate quantity of olive oil and roast until tender, stirring occasionally to prevent sticking. (If desired, roast additional veggies to serve on the side. We opted for beets, carrots, and parsnips.)
5. To bake the pizza: One hour before baking pizza, adjust oven rack to second highest or highest position (rack should be about 4 to 5 inches below broiler), set pizza stone on rack, and heat oven to 500°F. Remove dough from refrigerator and divide in half. Shape each half into smooth, tight ball. Place on lightly oiled baking sheet, spacing them at least 3 inches apart; cover loosely with oiled plastic wrap; let stand for 1 hour.
6. Coat 1 ball of dough generously with flour and place on well-floured countertop. (You really don't want to skimp here, or you'll risk sticking.) Using fingertips, gently flatten into 8-inch disk, leaving 1 inch of outer edge slightly thicker than center. Using hands, gently stretch disk into 12-inch round, working along edges and giving disk quarter turns as you stretch. (I find this is a pretty stretchy and forgiving dough as long as you don't go too, too thin.) Coat pizza peel with a generous amount of flour or (my preference) semolina flour. Transfer dough and stretch into 13-inch round. Using back of large spoon, spread 1/2 cup tomato sauce in thin layer over surface of dough, leaving 1/4-inch border around edge. (I stretch the dough as large as I possibly can and use more sauce than recipe calls for, though still a fairly thin layer.)
7. If using cheese: Sprinkle 1/4 cup Parmesan evenly over sauce, followed by 1 cup mozzarella. If using veggies: scatter assorted veggies over sauce. You want good coverage, but do not overload the pizza with heavy toppings or it will get soggy.
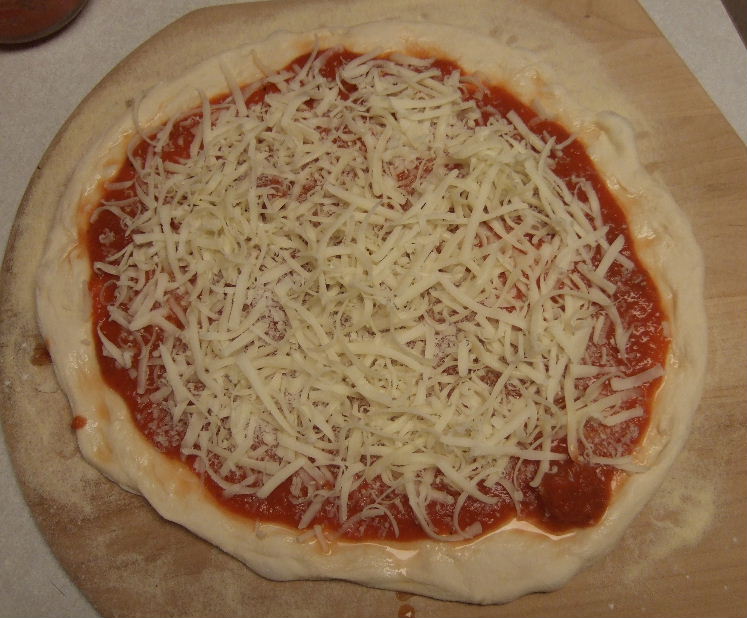
8. Slide pizza carefully but confidently onto stone and bake until crust is well browned and cheese (if using) is bubbly and beginning to brown, 10 to 12 minutes. Use baking peel to remove pizza from oven and place on wire rack. Let sit 5 minutes before slicing and serving. Repeat steps 6-8 to shape, top, and bake second pizza.
Vegan Mac n' Chz? No cheese pizza? What the hell is wrong with you people !?
Here you go- steak and bleu cheese, just for you, buddy.

Much more my preference, as well, though I'd certainly eat this pizza or the mac 'n' cheese. And at some point I'm definitely going to try the folded-over cookie recipe.
I am a very dedicated carnivore, but I'm happy to have a few more Citizen-tested veggie recipes in the rotation. We're going to be conscious about observing the strict fasts of Orthodox Lent this year (within Mrs. Hayes' limitations), and these are going to help. We've got Doc's black bean huevos and his corn chowder on the menu this week.
Thanks for sharing Pepper, this looks amazing! I'll be asking for a stone and peel for my birthday later this month and this will be the first recipe I try.
On a related note, Olives opened a second location (White Bear Lake) recently and some friends and I tried their House and the Margherita last night. I was very impressed; Kernel and I must have finished 8 square slices between the two of us - she asked for "more" probably three times. No small feat for a 2.5-year-old.
a stone is a must. A peel is a must. I have two peels -- one to assemble and put pizzas in with, and one to remove pizzas with.
and I can't concur strongly enough on oven temperature -- mo hotta, mo betta.
You're smart having two peels. I once assembled the second pizza on my peel while the first was still in the oven. Then I realized I needed to use the peel to remove the first pizza from the oven. That was a wee bit awkward.
a thought: absent a second peel, you could probably assemble on top of a piece of wax paper or parchment paper (on top of a cutting board or the back side of a half-sheet or jelly roll pan so that the lip is pointing down) thoroughly dusted with corn meal, then slide it onto the peel when ready.
but I'd still strongly recommend the second peel.
Alternately, you can slide the cooked pizza out of the oven and onto said cutting board (wood, not plastic!) or cookie sheet from underneath using a spatula.
But a second peel makes things easier.
true. probably easier than my suggestion, since the crust will be more rigid after baking.
also, I gotta learn to use tongs to help get the baked pies onto the peel for extraction. My technique is deficient, as I sometimes push the pie backwards into the rear wall of the oven. Or singe my fingers trying to grab hold to assist the peel.
Good to know! My parents are in WBL, so I do have reason to be in that part of town every so often.
looks delish.
The Girl is partial to hummus as a pizza topping. Hummus, garlic, sauteed onions and mushrooms, red bell pepper.
also, Daiya works adequately (I won't say "well") as a cheese substitute on pizza for her.
That looks absolutely delicious. If only I had a stone or peel.