Tag Archives: The Nation Has An Appetite

Bake Your Own Pretzels

I was just telling a friend the other day how much I like homemade baked pretzels, and I figured some of y'all might be interested in the recipe as well!

I've been making this recipe from Alton Brown for a few years now, and it has never disappointed.

Notes:
The directions call for using a stand mixer, but there's no reason these couldn't be mixed and kneaded by hand if you were so inclined.

Authentic baked pretzels are boiled in lye, but the baking soda/water mixture in this recipe works pretty darn well and involves a lot less in the way of safety precautions.

If you don't have pretzel salt, you can use coarse kosher salt, but the real thing is better. I couldn't find any pretzel salt in stores, so I ordered it online. The smallest size container I found was 2 pounds, so I expect I'll be making this recipe for many years to come...

Ingredients
1 1/2 cups warm water (110-115°F)
1 tablespoon granulated sugar
2 1/4 teaspoons active dry yeast (1 package)
1 lb, 6 oz all-purpose flour*
2 teaspoons kosher salt
2 ounces unsalted butter, melted
vegetable oil (I use spray canola oil)
10 cups water
2/3 cup baking soda
1 large egg yolk beaten with 1 tablespoon water
pretzel salt

Directions
Combine water and granulated sugar in the bowl of a stand mixer and sprinkle the yeast on top. Let sit for 5 minutes (or until the mixture begins to foam). Add flour, kosher salt, and butter. Using the dough hook attachment, mix on low speed until well combined. Then change to medium speed and knead until the dough is smooth and pulls away from the side of the bowl, approximately 5 minutes.

Remove dough from the bowl, clean the bowl, and then oil it well with vegetable oil. Return the dough to the bowl, cover with a towel, and let sit in a warm place for 50 to 55 minutes--or until the dough has doubled in size.

About 20 minutes before the end of the rising time, preheat oven to 450°F. (My oven runs a bit cool, so I set it to closer to 475°F. The pretzels won't brown well if your oven isn't hot enough.) Line two large cookie sheets with parchment paper.

Also before the end of the rising time, bring 10 cups water and baking soda to a rolling boil in a large saucepan.

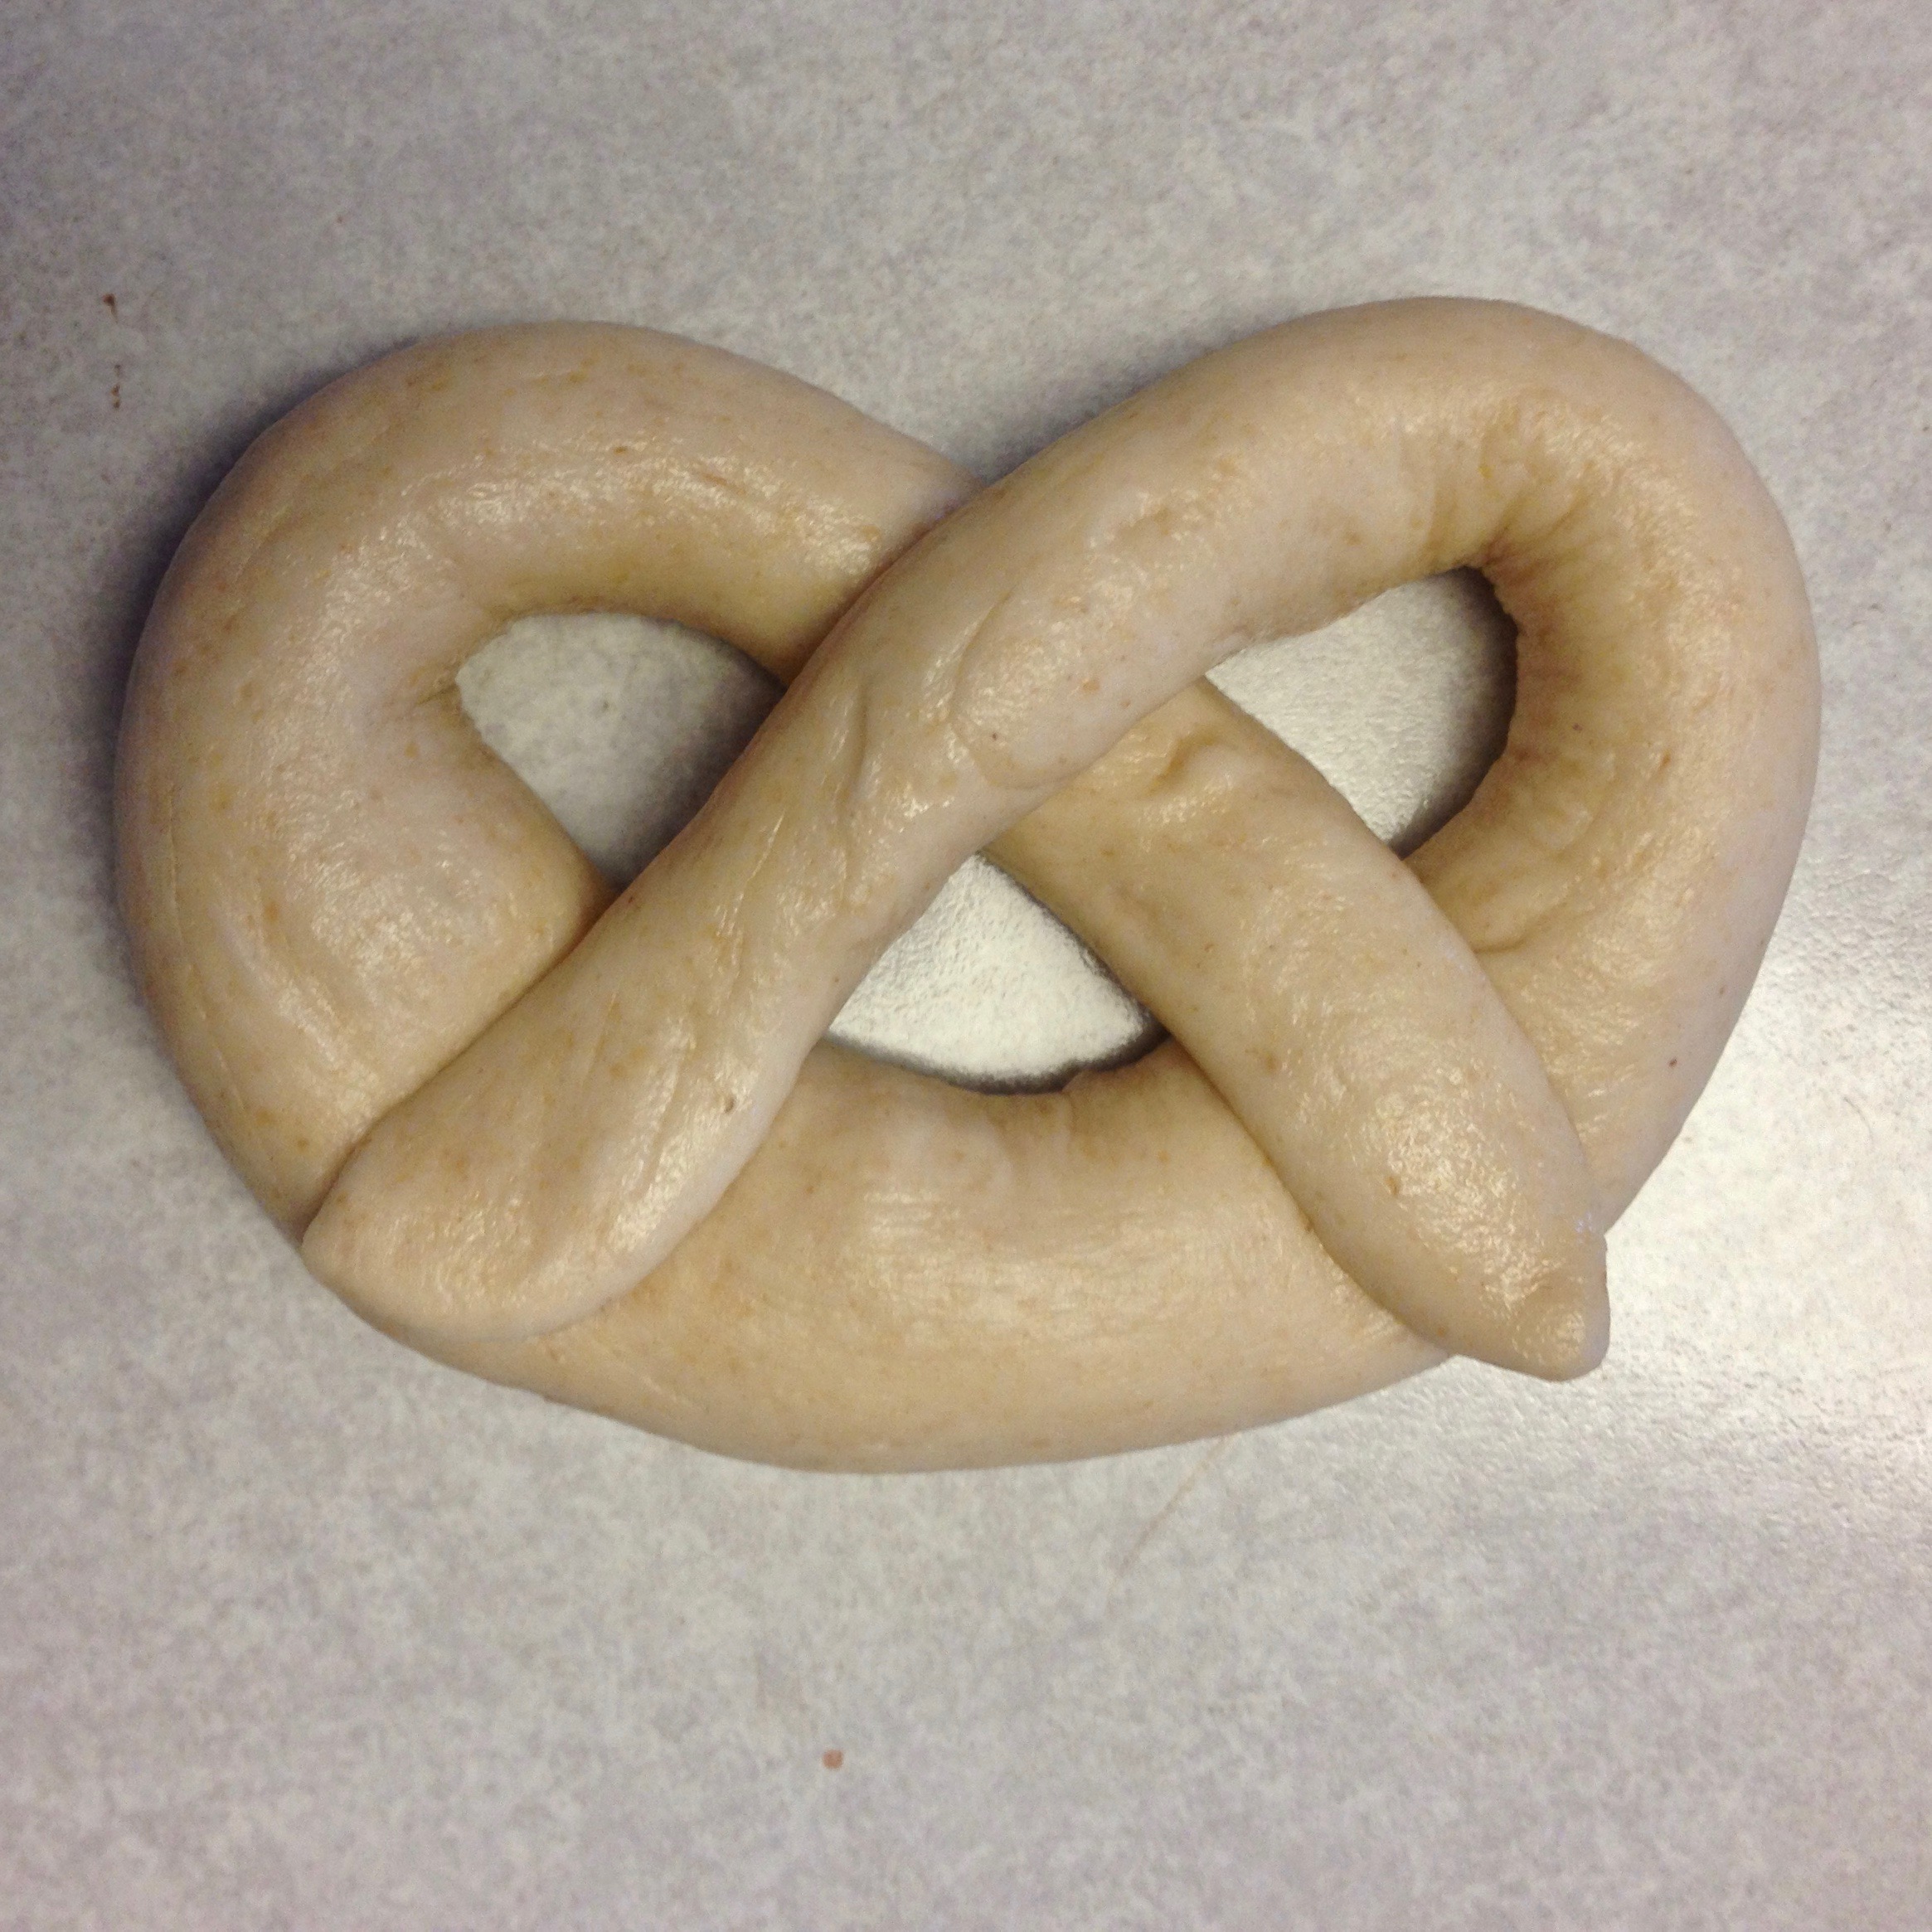
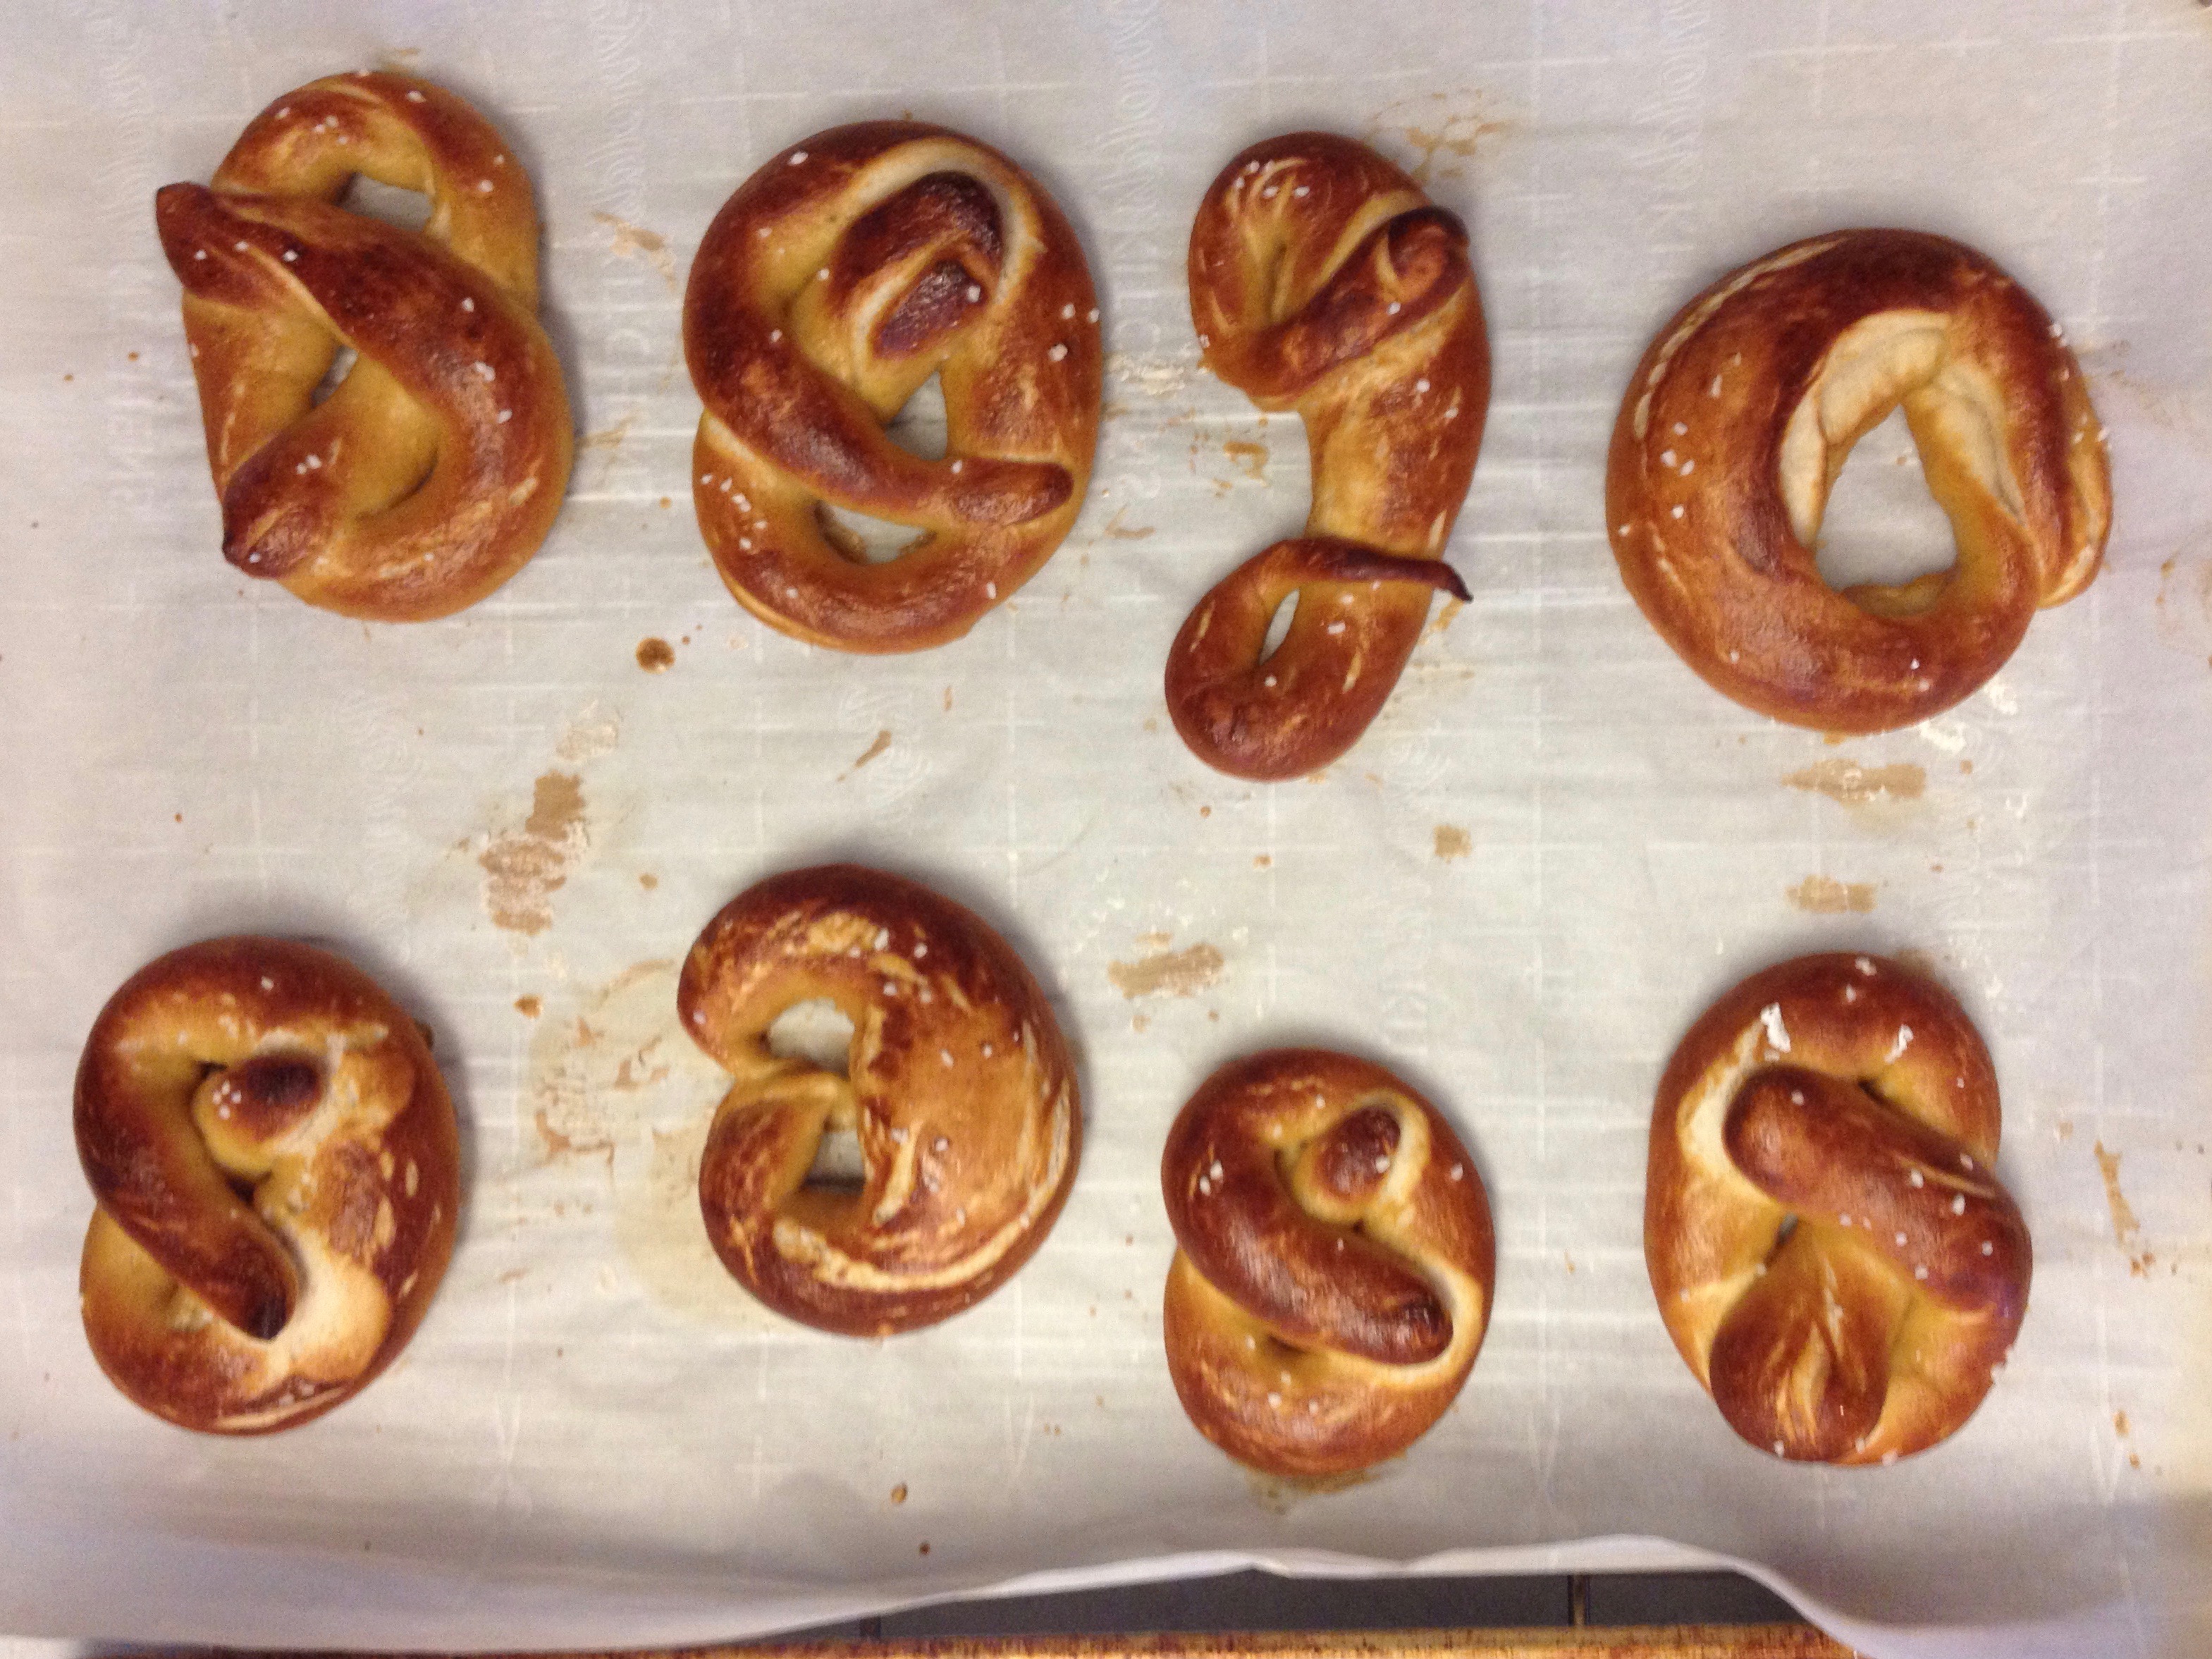
When dough has finished rising, turn it out onto a slightly oiled work surface and divide into approximately 16 equal pieces. (Alton suggests 8 pieces, but I find that to be so large it's pretty much a meal in and of itself. Since I usually bring these pretzels to gatherings where other food is served, I opt for a smaller size.) Roll out each piece of dough into an 18-inch rope (estimating is fine here--no need to get out a ruler!). Make a U-shape with the dough rope, then hold the ends and cross them over each other. Press the dough ends firmly onto the bottom of the U-shape so that the pretzel will hold its shape. Or feel free to experiment with other shapes--just don't get too intricate, and it'll be fine.

You can either shape all your pretzels at once or alternate shaping them and boiling them. Or enlist child labor helpers to help shape the dough.

Place the pretzels into the boiling water, one at a time, for approximately 30 seconds. (I've gotten distracted and left pretzels in the water for far longer than this; they still turn out fine.) Remove them from the water using a slotted spoon (Alton Brown suggests a large, flat spatula for this, but I prefer my trusty spoon). Place pretzels on the lined cookie sheet, leaving 1.5" to 2" between pretzels.

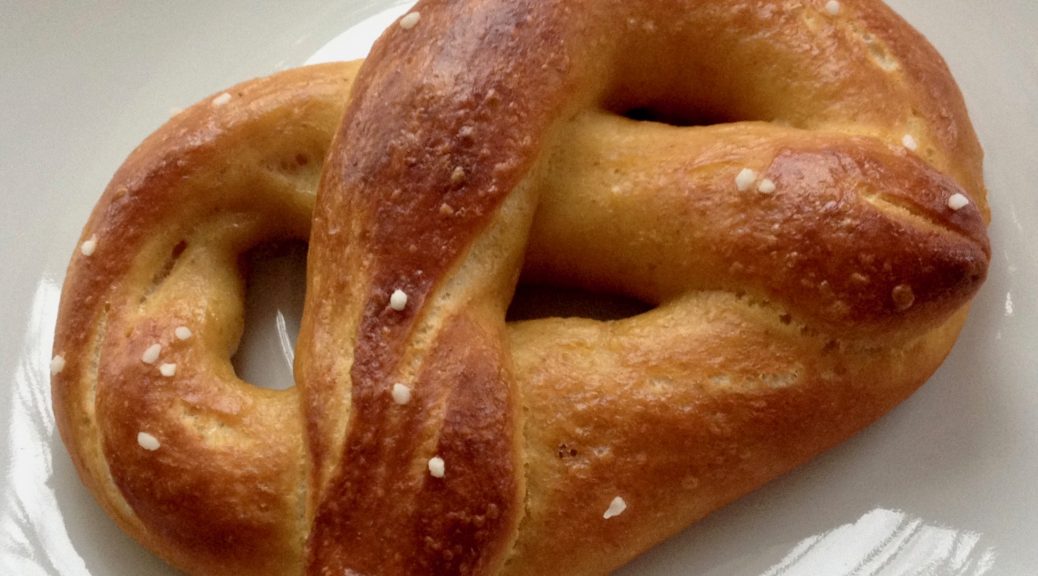
Brush the top of each pretzel with the beaten egg yolk and water mixture and sprinkle with the pretzel salt. Bake until dark golden brown in color, approximately 12 to 14 minutes. (Don't chicken out and remove these from the oven too early--you want them to get fairly dark.) Transfer to a cooling rack for at least 5 minutes before serving.

*I have been known to swap in 6-8 ounces of white whole wheat flour

Smoking with meat (and not just smoked meats)

My trusty weber kettle recently started to rust in several spots because a subcontractor* dropped a hammer on it last year.  I was the next person in line at work to get free swag from our U-Line order so I got a new weber kettle (!). I spent a lot of time on the interwebs looking for ideas on how to modify my old kettle before settling on making a DIY electric smoker. Why electric you ask? Because it's a hell of a lot easier than setting up and babysitting a charcoal smoker. Yeah, yeah, yeah, I've heard all the complaints about how smoking shouldn't be easy, and that half the fun is tweaking the vents, and how it's cheating, and how / and how / and how. ... pfffffffffft. After testing this unit out and dialing in 225 and 250 on the thermostat I can say that this is pretty close to set it and forget it. I bought a replacement electric smoker element from amazon with an adjustable thermostat. The I used a dremel with a metal cut off wheel to cut the opening for the electric element, and then had to bend some parts into submission with brute force. The electric element has a set of mounting holes, and I drilled through the kettle and set the element in place with some stainless bolts. Figuring out how high to place the element was the only bit of struggle I had with this build. I removed the charcoal grate and made sure that the ash sweeps / vent covers weren't impeded and set about cutting open the grill. I bought two stainless steel chafing pans, the smaller one to act as a water pan  / dripping catcher, and the other to hold wood chips.

The first run featured perfectly cooked salmon and pulled pork, but the smoke flavor was definitely lacking . After looking into the ash tray I discovered that most the wood chips hadn't really caught fire. I figured out that the pan gets hot enough to make some of the chips smolder, but not hot enough to foster minion method burning. Some further inter-webbing solved that problem.  Enter the a-maze-n pellet smoking tube. While I haven't actually used the pellet smoker yet, but i found that the wood pellets** produce a ton of smoke just laying on the bottom of the larger chafing pan. I also started a few of the pellets in one corner to ensure smoke production The second run produced excellent , smokey results. I ran at 245˚ ish degrees and successfully smoked a boston butt, a chicken carcass, and some pink salt. When the a-maze-n shows up I fully indent to cold smoke cheese, tofu, and nuts (and anything else I can think of), and I'll update on how it works.


*me

**There is a mountain of information and opinion on pellet smoking / pellet composition / binders / ////// The conclusion I came to was to use 100% hardwood pellets, and what I found in my area was traeger branded pellets. The flavor was excellent. One other note on the traeger grills, I've had "smoked" meats from pellet grills that were excellently cooked with no smoke flavor. What I've read now makes sense, the pellet grills get to temperature and then maintain temperature without actually burning that much fuel. No burning = no smoke flavor. I feel pretty great that I've made something out of a rusting kettle that makes food better than the 1000$ pellet grills...

Chicken Tacos and Black Beans, Instant Pot Style

I made these two dishes over the last week, and they both ended up being really, really good.  Plus, they even go well together; I'm planning on having the leftovers from these two for my lunch tomorrow.  And I'm sure these recipes would be doable without the technological marvel that is an Instant Pot, but this is how I made them.  Plus, it gave me another reason to use the steam diverter my wife got for Christmas, which my kids call "angry daddy."  It looks pretty funny when it goes off, plus it makes it easy to turn the release valve without using a hot pad.

Chicken Tacos

(taken from here, with some small changes)

I had some leftover poblano peppers when I found this recipe, and thought I'd give it a shot.  It ended up with a bit more liquid in it than I would have preferred for tacos, but the chicken was tasty, and not at all dried out.  I'll probably try less liquid next time.  I was also worried beforehand that it would taste too much like orange juice,  but it ended up just having a hint of orange flavor.

  • 2 tablespoons olive oil
  • 2 large chicken breasts (about 3 pounds)
  • 1.5 tablespoons Kosher Salt
  • 1 teaspoons Pepper
  • 1  red onion, peeled and thinly sliced
  • 2 Poblanos, diced
  • 5 cloves garlic, minced
  • 2 tablespoons cumin
  • 1.5 cups chicken stock
  • 1.5  cups orange juice

Set Instant Pot to sauté mode, and add a little oil.  Season chicken on all sides with salt and pepper.  When oil is hot, work in batches to sear chicken on both sides, leaving it alone for long enough to get a nice brown on it (not sure this step actually did much; could probably skip it, but I could get the chopping done while the chicken was in, so it probably didn't add that much time).  Remove to a plate when they are done browning.

Add 2 tablespoons of olive oil, then add peppers and onions.  Cook 5 minutes or so, until tender.  Then, add cumin and garlic, stirring for about a minute until fragrant.  Add back in the chicken along with the stock and orange juice.

Seal up the cover, and set for 35 minutes.  When timer goes off, wait 5 minutes, then release steam.  Remove the chicken, shred it, then stir it back in to the sauce.  Serve on lightly-charred corn tortillas with lime, cilantro, cheese, guacamole, hot sauce, etc.

I didn't think of writing this up until after dinner, so I didn't take a picture of the tacos, but here's what part of the leftovers looked like:


Black Beans

(taken from here, with some adjustments)

So those chicken tacos were good, but these black beans are great.  Everyone it the family loved them.  Both of my kids ate  multiple rounds at dinner, and one said they are his favorite beans ever (which is saying something from a kid who could probably eat an entire can of refried beans by himself).  They end up tasting rich and salty, with the creamy liquid pairing with the just-slightly-al-dente beans to make a perfect texture combination.  Plus, it's super cheap and easy, and no soak required.

This is the recipe for half the original batch on the website above, which still makes a lot of beans.  They save well in the fridge, but a full pound of beans is more than we can get through in a week.

  • 0.5 pound dry black beans
  • 1.5 cups water
  • 0.5 yellow onion, sliced in rounds
  • 2 garlic cloves, sliced in half
  • 0.5 teaspoon cumin
  • 1 teaspoon salt
  • 1 bay leaf
  • 1 teaspoon worcestershire sauce

Put everything in the Instant Pot.  Seal the lid, and set if for 30 minutes. (The recipe I took this from called for only 22 minutes, but the beans were still pretty crunchy at that point, so I kept adding time and testing it, and it ended up being about 30 total.)  Let it sit for 10 minutes when the time is up, then release the steam and serve.

These beans are great on their own or with some hot sauce.  Sour cream would make some sense here, too.  They work as a side for grilled meat or tacos, as a vegetarian burrito filling,  or just on their own; a bowl of these beans makes for a pretty great lunch.

I also didn't take a picture of this when I made it, but it still looks pretty good after a couple of days in the fridge.

The Best Hot Cocoa Mix

So what do you do with that leftover fancy cocoa powder you bought to make that delicious, Nutella-esque chocolate and peanut concoction? You make your own cocoa mix! And trust me, this is waaaaaaaay tastier than that stuff you buy at the grocery store.

Ingredients
1/2 cup (100 grams) granulated sugar
1 tablespoon (8 grams) cornstarch
3 ounces (85 grams) bittersweet chocolate, roughly chopped
1/2 cup (40 grams) Valrhona cocoa powder
1/4 teaspoon vanilla extract
1/8 teaspoon fine sea salt

Combine all ingredients in a food processor and blend until thoroughly pulverized.

Before pulverization:

After pulverization:

To use (stovetop version): Heat one cup of milk in a saucepan over medium heat until it begins to steam. Add 3 tablespoons cocoa mix. Whisk over heat for another minute or two, until it begins to simmer and mix is completely dissolved. (Obviously you can make more than one cup at a time, depending on how many people you're serving.)

To use (microwave version): This mixes together better if you heat the cocoa mix with the milk rather than mixing it after the milk has been heated. Measure 3 tablespoons cocoa mix into one cup of milk but don't bother stirring it. Heat for 90 seconds and then stir vigorously. Then heat for 20 more seconds or until cocoa is at desired temperature. (Aside: my microwave is pretty wimpy, so you may want to reduce these times if you are using a more powerful model.)

Bonus tip--I store my cocoa mix in a container with the measurements noted on it to make life easy:

Recipe source: Smitten Kitchen

Pepper Butter

If I make peanut butter, it should logically be called Pepper Butter, yes?

With that important matter taken care of, here's what you need to know: assuming you own a food processor, this is insanely easy and also delicious. Roasting the peanuts is key to getting fantastic flavor, and I love that you can tweak the amount of salt and honey to get exactly the flavor YOU like best.

Ingredients
15 ounces shelled and skinned raw peanuts
1 teaspoon kosher salt
1 1/2 teaspoons honey
1 1/2 tablespoons peanut oil

Directions
Preheat oven to 400°F. Spread peanuts on a rimmed cookie sheet. Roast for 10 minutes. Remove and let cool for about 10 minutes.

Place the peanuts, salt, and honey into the bowl of a food processor. Process for about 5 minutes. The mixture will look dry and rather dough-like for the first few minutes, but keep going. Eventually, like magic, it’ll liquefy. Scrape down sides of the food processor. Place the lid back on and continue to process while slowly drizzling in the oil and process for another minute or so. Taste and adjust salt, honey, or oil if needed. (A little extra oil helps if it’s not quite as smooth as you’d like.) In my first attempt, I added a little more honey and oil.

Place the peanut butter in an airtight container (I used a mason jar) and store in the refrigerator for up to 2 months.

Adapted from here.

French Onion Soup, the easy(ish) way.

As I said last night I'm not really a soup kind of person. Though, now that I think about it I actually have become more of a soup person over the years. We make a green chili stew when it's not hotter'n the blazes - which here is like 2 months of the year - and I'll order pho over bun every day ... and we've been making this white bean and corn soup ... and we've been making crab and corn bisque ... I'm a soup guy? That doesn't line up with my self image. anywho ...

This is lifted from America's Test Kitchen

4lbs onion - yeah, seems like a lot ... it isn't
3 tbs butter cut into three slices
1/2 cup dry sherry
2 cups of water plus additional for deglazing
4 cups of chicken broth
2 cups of beef broth - I used better than broth - its my secret weapon for beefy magic flavor
4 sprigs of fresh thyme
1 bay leaf
crusty baguette
shredded gruyere

Method:
Cut onions in half through the roots, and slice pole to pole in 1/4 inch slices. Preheat oven to 400˚. Put onions into a well oiled dutch oven, top with butter and a 1/4 tsp salt. Put dutch oven in oven covered for an hour. (their method has you then take the pot out of the oven and stir the onions, replace the pot in the oven with the lid cracked for another 1.5 to 1.75 hours- I just cranked up the heat on the burner and stirred the onions to keep them from burning. You're looking for the liquid to evaporate and for the pot to run dry. When a dark crust begins to form on the bottom of the pan add a quarter cup of water to deglaze the pan. Continue to run the pot dry several times until the onions are dark brown - but not burnt! - and are beginning to break apart. the last time you deglaze the pot use the 1/2 cup of dry sherry and cook until the liquid evaporates. Add the water, stock beef broth (or better than broth), bay leaf, and thyme stir to combine, and then bring to a boil and simmer for 30 minutes. Slice the baguette into thick slices and bake dry in the oven - drying these out will improve the crunchy texture of the crust when they're submerged into the soup - once dry top with shredded gruyere and broil until the cheese is bubbly and golden brown on top. Serve in a deep bowl with cheesy bread dunked into the bowl.

This was phenomenal. The hardest part is standing over the pot making sure the onions don't burn.

Curry Chicken Pot Pie

By popular demand, here is an improvised version of curry chicken pot pie.

The good doctor requested fall food because the outside air temp dropped below boiling. We had a curry in London that resembled super smooth butternut squash soup with chicken bits, and decided that we could make that happen at home. After several attempts we discovered that we were missing some fat source be it cream / butter / ???. We shelved the recipe in favor of a Korma recipe that is always solid only to return to the idea when the weather turned cool(ish). To do this you'll need:

cubed butternut squash
cubed sweet potato
diced carrots
peas
a toe of garlic smashed
a small hand full of raisins
diced chicken parts (we used breasts, though thighs would def. amp up the flavor values)
curry seasoning (make your own if you feel sassy)
nutmeg
a bay leaf
salt and pepper
pie crust (if you make your own then you win) (trader joes is pretty alright, pilsbury is more than alright)
pyrex or similar oven safe bowls (though some consumer groups say that pyrex aint what it used to be... so be careful when dealing with wild temp swings and glass cookware)

The ratios of this are really not hard math, I used a bag of butternut squash cubes from trader joes (because lazy), 4 carrots, two small sweet potatoes from my garden. I roasted half the veg to roast, and half the veg for the sauce. I ended up with thee of the 2 cup pyrex individual pot pies. I used the left over crust to make a flower top for decorative / more pie crust goodness

Method:

I roasted half the sweet potato and butternut squash along with the carrots to add flavor / texture dimension to the final product. I tossed the veg with a little olive oil, salt, pepper and curry powder prior to roasting in a 450 degree oven. I removed the veg when brown / starting to blacken on the edges (about 25 minutes). I dumped a handful plus of frozen peas onto the roasting pan after I removed it from the oven (both arrests the cooking of the veg and thaws the peas). While the veg is roasting I add the remaining butternut squash and sweet potato (you can also add some carrot / parsnips) to a 2 quart sauce pan with just enough water to cover, plus salt and pepper and a dose of curry seasoning, and bring to a roiling boil. Boil this mixture until the veg falls apart, and mash in the pan. At this point the liquid in the pan should be fairly runny. Add the diced chicken parts to the pan with another dose of curry seasoning, the bay leaf, a pinch of nutmeg (my secret weapon...) and the smashed garlic toe. Simmer until the chicken in cooked through and the sauce is thickened to your desired taste. Add the roasted veg + peas + a handful of raisins to the pot and simmer out any additional liquid. As this happens have your oven preheated to 425 (YMMV). Portion out your sauce / chicken / veg mix into your baking dish(s), and cut your pie crusts to hang over the edges. Cut some vents and bake until the crust is golden brown. (an egg wash will help with browning, but isn't necessary for flavors). Basically this is a boiler plate for seasoned chicken pot pie with no dairy. You could use (gasp) tofu, ginger, lemongrass, green thai curry etc etc etc etc as flavor enhancers.

you're welcome.

Monster-esque Cookies

I had these cookies for the first time at a Halloween party a long time ago, and therefore I always associate them with Halloween. I don't know for sure exactly what elements are required for a true monster cookie, but these are at least a close relative of monster cookies. While there's no small amount of sugar in these, they somehow don't taste overly sweet, which I appreciate.

1 cup (8 oz.) butter, softened
1 cup (9.5 oz.) natural peanut butter
1 1/2 cups (12 oz.) brown sugar
1 cup (7 oz.) granulated sugar
2 eggs, room temperature
2 teaspoons vanilla
2 cups (7 oz.) old-fashioned oats*
1 1/2 cups (7 7/8 oz.) whole wheat flour
1 teaspoon baking soda
12 oz. chocolate chips**
2 cups M&M's
1 cup chopped walnuts (optional; I didn't use them)

Preheat oven to 325°F. Line two baking sheets with parchment paper.

Using a stand mixer (or sturdy electric hand mixer and a large bowl), cream butter and sugars for approximately 3 minutes, until light and fluffy. Scrape down sides of bowl.

Add eggs and vanilla, mixing for about 1 minute.

Add oats, flour, and baking soda. Mix until combined, about 30 seconds. Stir in chocolate chips, M&M's, and walnuts (if using).

Use a cookie scoop, spoon, or your hands to form dough into 1.5-inch balls. Place about 2 inches apart on cookie sheets.

Bake for 10-15 minutes, rotating sheets on top and bottom racks halfway through. When done, the tops of the cookies should be just beginning to brown. Remove cookies from the oven and transfer to a wire rack to cool completely.

Store in an airtight plastic container or ziplock bag for up to 1 week.

*The recipe calls for quick-cooking oats, but I didn't have any, and I thought the cookies turned out great with old-fashioned oats.
**I used Ghirardelli bittersweet chips because I love them, but any variety will do.

Recipe source: a lovely woman named Amy who may or may not have originally gotten the recipe from a Martha Stewart magazine

Burrito Bowl-ish

I don't know quite how to say this, guys. I'm obsessed with meat's beans. I put this meal together to showcase the beans . . . and also so that I'll now have an easy way to find the recipe anytime I need it.

INGREDIENTS
Quick Pickled Red Cabbage:
2 cups sliced red cabbage
1/2 teaspoon peppercorns
1/2 cup water
1/2 cup white vinegar
1 tablespoon honey
1 teaspoon kosher salt

Meat's Black Beans:
1 1/2 tablespoons olive oil
1/2 teaspoon cumin
1/2 teaspoon chili powder
1/4 teaspoon smoked paprika
freshly ground black pepper
1 small onion, minced
2 cloves garlic, minced
2 15-oz. cans black beans, drained and rinsed
2 cups vegetable stock

Greens:
1-2 cloves garlic, sliced thinly
1 tablespoon olive oil
3 cups spinach, kale, or other greens, washed and spun in a salad spinner (or otherwise mostly dried)

Other:

cooked brown rice
avocado, sliced or cubed
cilantro
shredded cheddar cheese
salsa
sour cream
tortilla chips
(anything you want, really)

DIRECTIONS
To make quick pickled red cabbage:
Pack a 2-cup mason jar (or other heat-proof container) with the cabbage and peppercorns.

In a small saucepan, mix water, rice vinegar, honey, and salt. Heat and stir until the salt and honey dissolve. Pour hot liquid over the cabbage, making sure all of it is submerged. Seal and allow to sit at room temperature until the brine cools slightly and the jar is warm to the touch but not hot. Transfer to the refrigerator and chill. (Keeps for 2 weeks.)

To make meat's black beans:
Measure olive oil into a cast iron skillet over medium heat. Bloom cumin, chili powder, freshly ground black pepper, and smoked paprika in oil (about 1 minute). Add minced onion and garlic and saute until browned. (At this point, everything will smell insanely good.) Add black beans and stock. Let come to a gentle boil and cook uncovered until liquid is reduced to a paste.

To make greens:
In a skillet, saute garlic in olive oil. Add greens and cover until wilted, about 5 minutes.

To assemble your bowl of deliciousness:
Start with a base of brown rice. Add cabbage, beans, greens, avocado, cilantro, shredded cheddar cheese, salsa, sour cream, tortilla chips, or whatever floats your boat. As lovely as it looks after assembly, I prefer to mix together everything except the chips before devouring it. But really, eat it however you want.

Cabbage recipe modified from Food for My Family.
General inspiration from Joy the Baker.