Category Archives: The Nation Has An Appetite

Smoking with meat (and not just smoked meats)

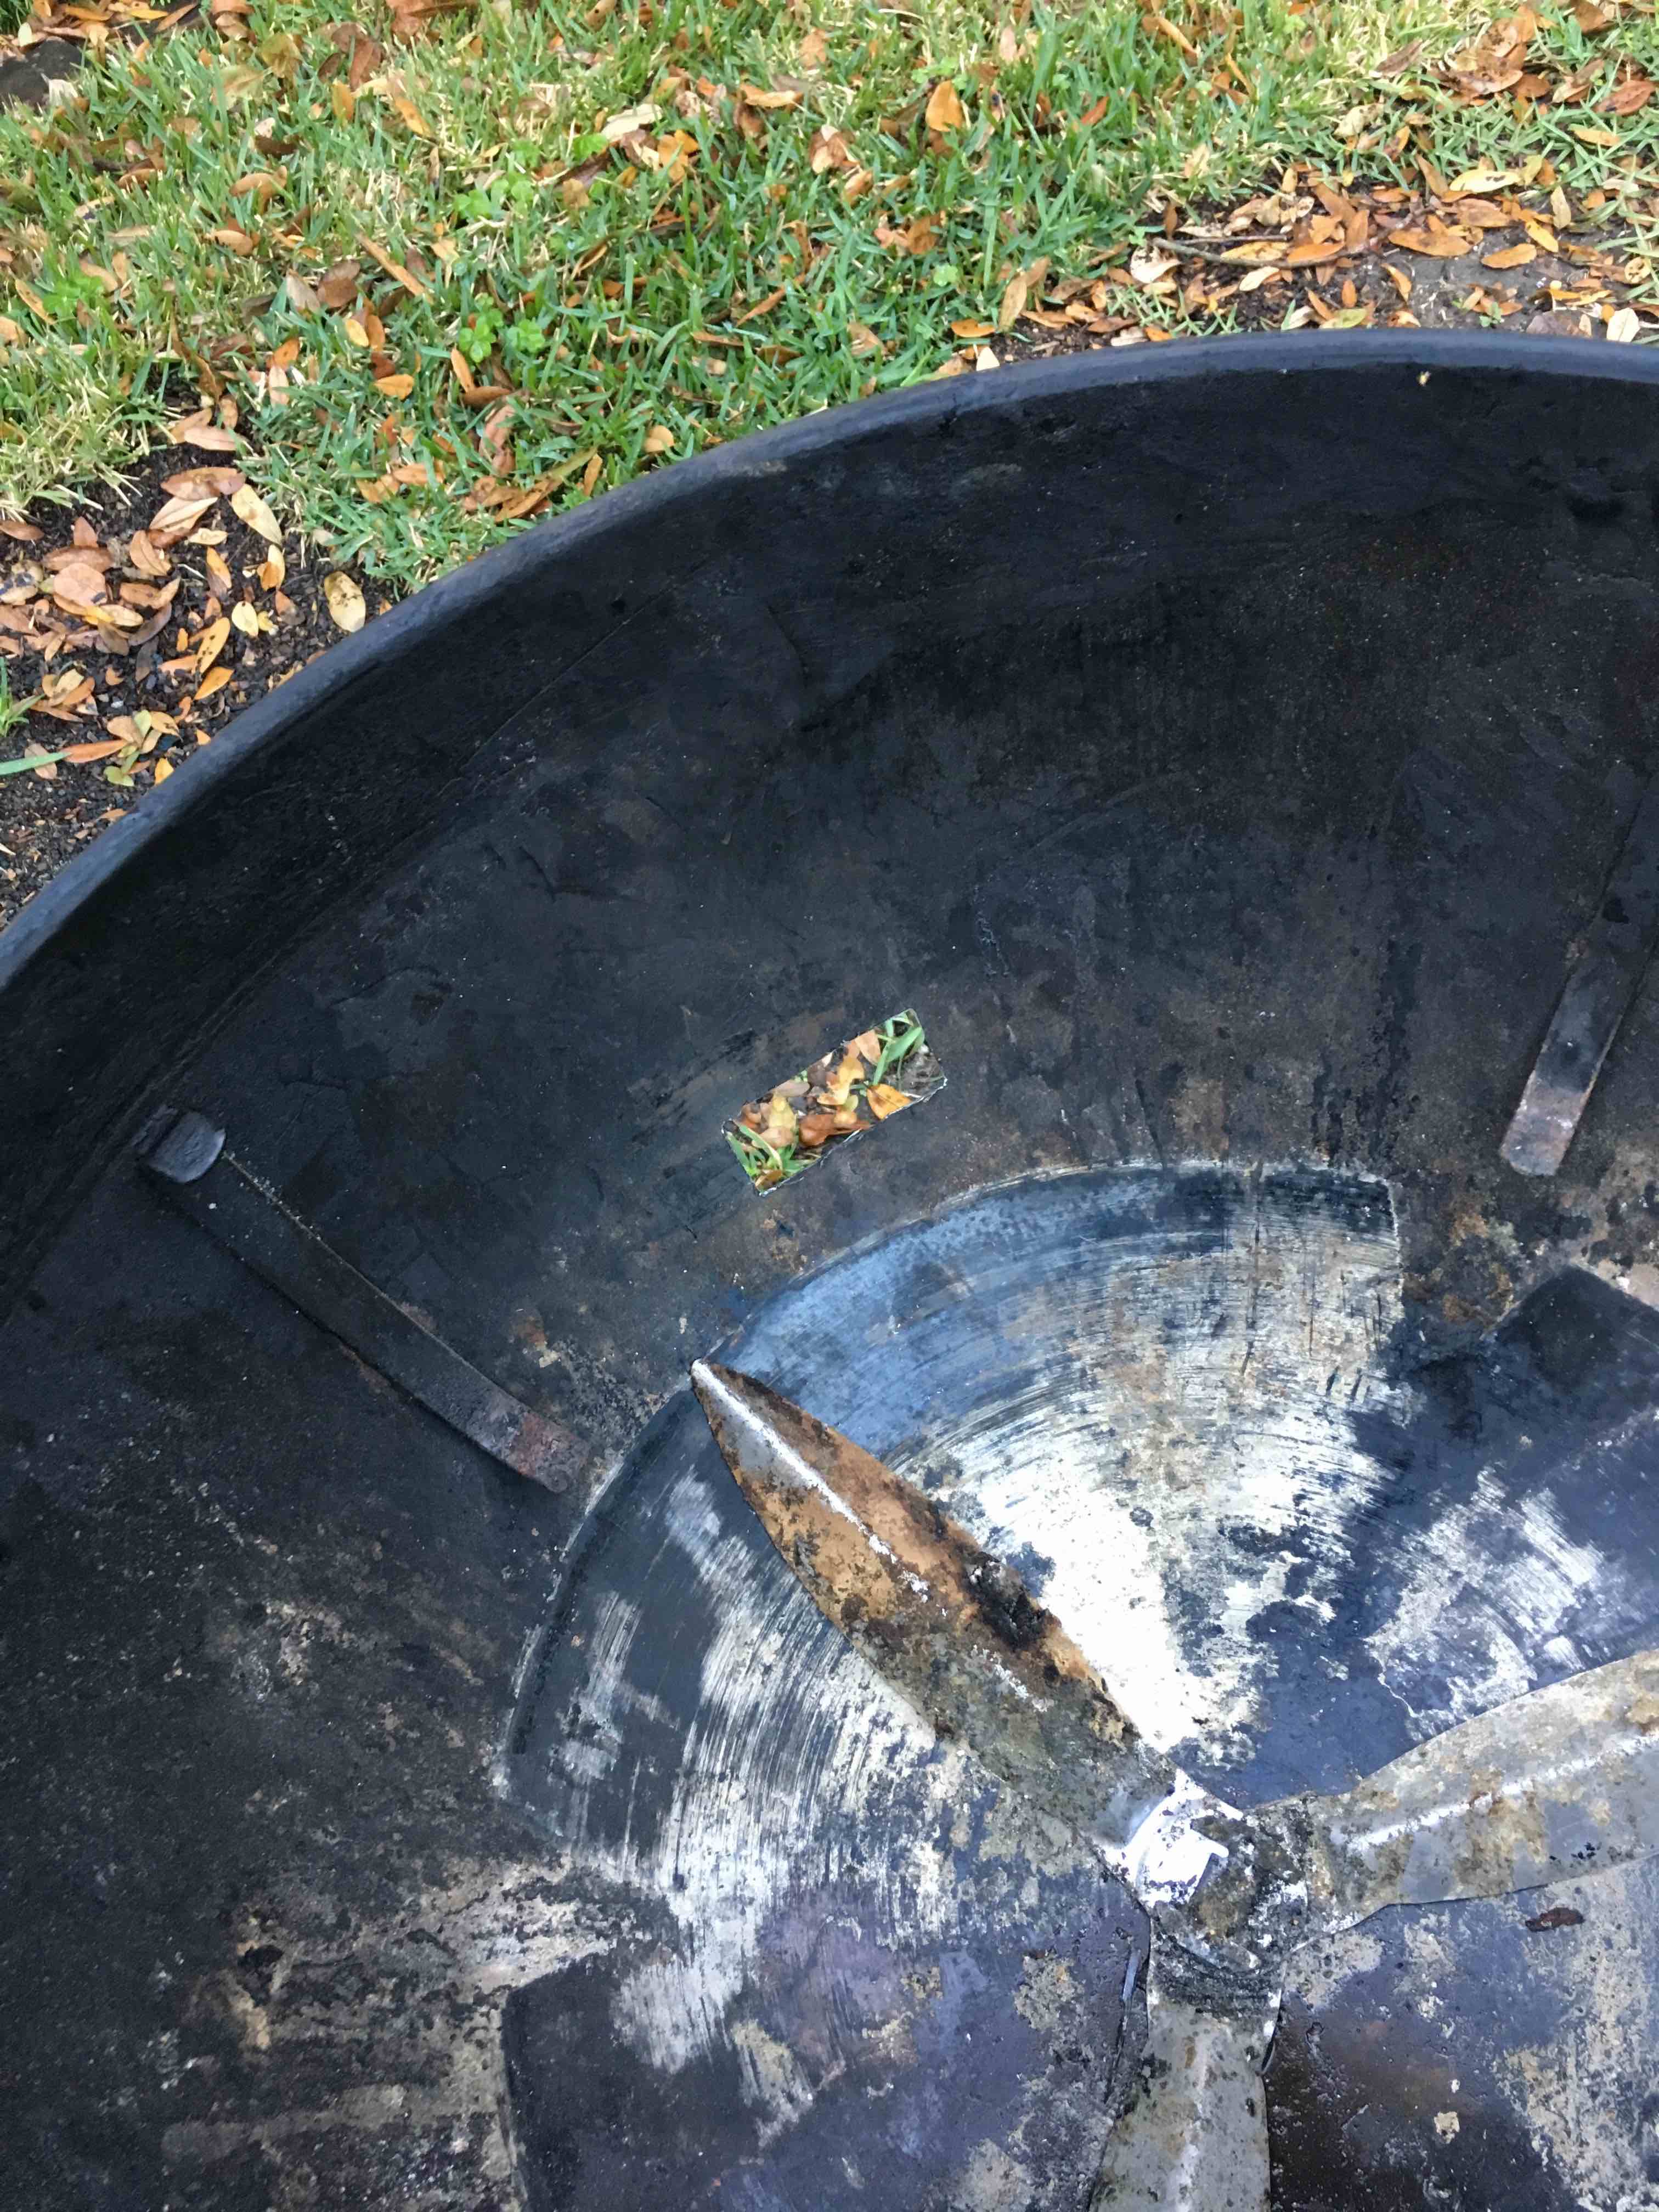
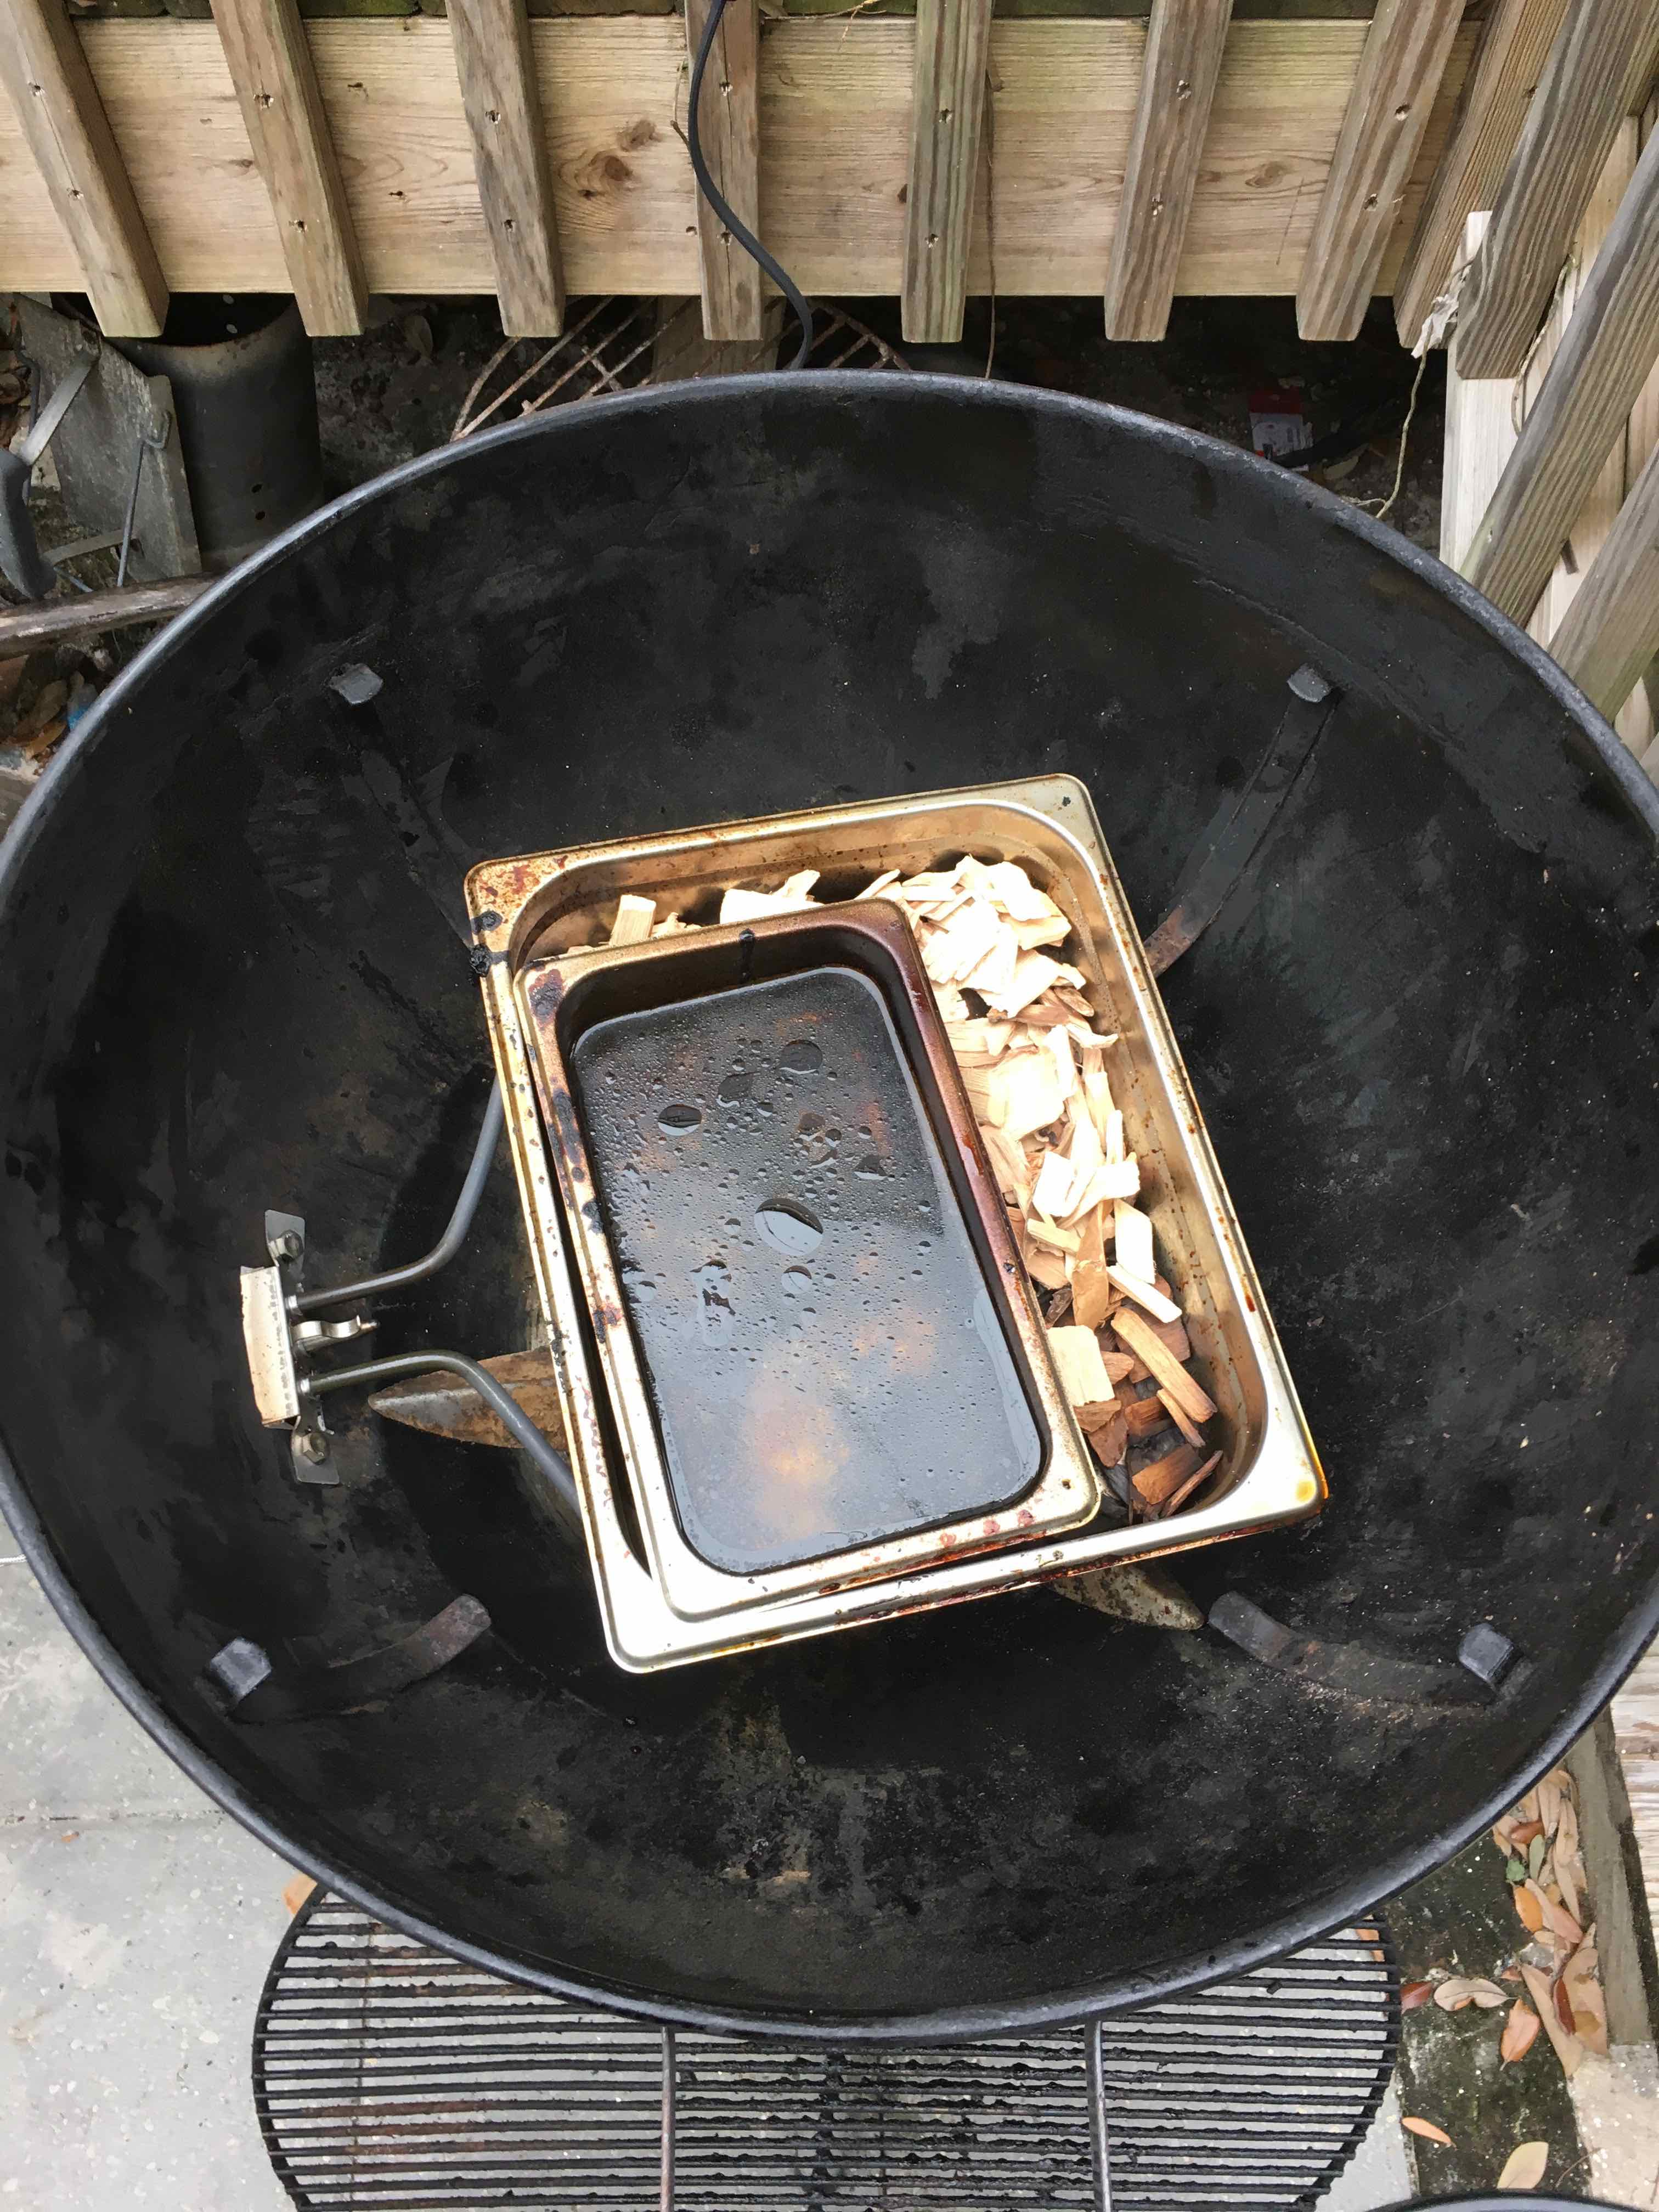
My trusty weber kettle recently started to rust in several spots because a subcontractor* dropped a hammer on it last year.  I was the next person in line at work to get free swag from our U-Line order so I got a new weber kettle (!). I spent a lot of time on the interwebs looking for ideas on how to modify my old kettle before settling on making a DIY electric smoker. Why electric you ask? Because it's a hell of a lot easier than setting up and babysitting a charcoal smoker. Yeah, yeah, yeah, I've heard all the complaints about how smoking shouldn't be easy, and that half the fun is tweaking the vents, and how it's cheating, and how / and how / and how. ... pfffffffffft. After testing this unit out and dialing in 225 and 250 on the thermostat I can say that this is pretty close to set it and forget it. I bought a replacement electric smoker element from amazon with an adjustable thermostat. The I used a dremel with a metal cut off wheel to cut the opening for the electric element, and then had to bend some parts into submission with brute force. The electric element has a set of mounting holes, and I drilled through the kettle and set the element in place with some stainless bolts. Figuring out how high to place the element was the only bit of struggle I had with this build. I removed the charcoal grate and made sure that the ash sweeps / vent covers weren't impeded and set about cutting open the grill. I bought two stainless steel chafing pans, the smaller one to act as a water pan  / dripping catcher, and the other to hold wood chips.

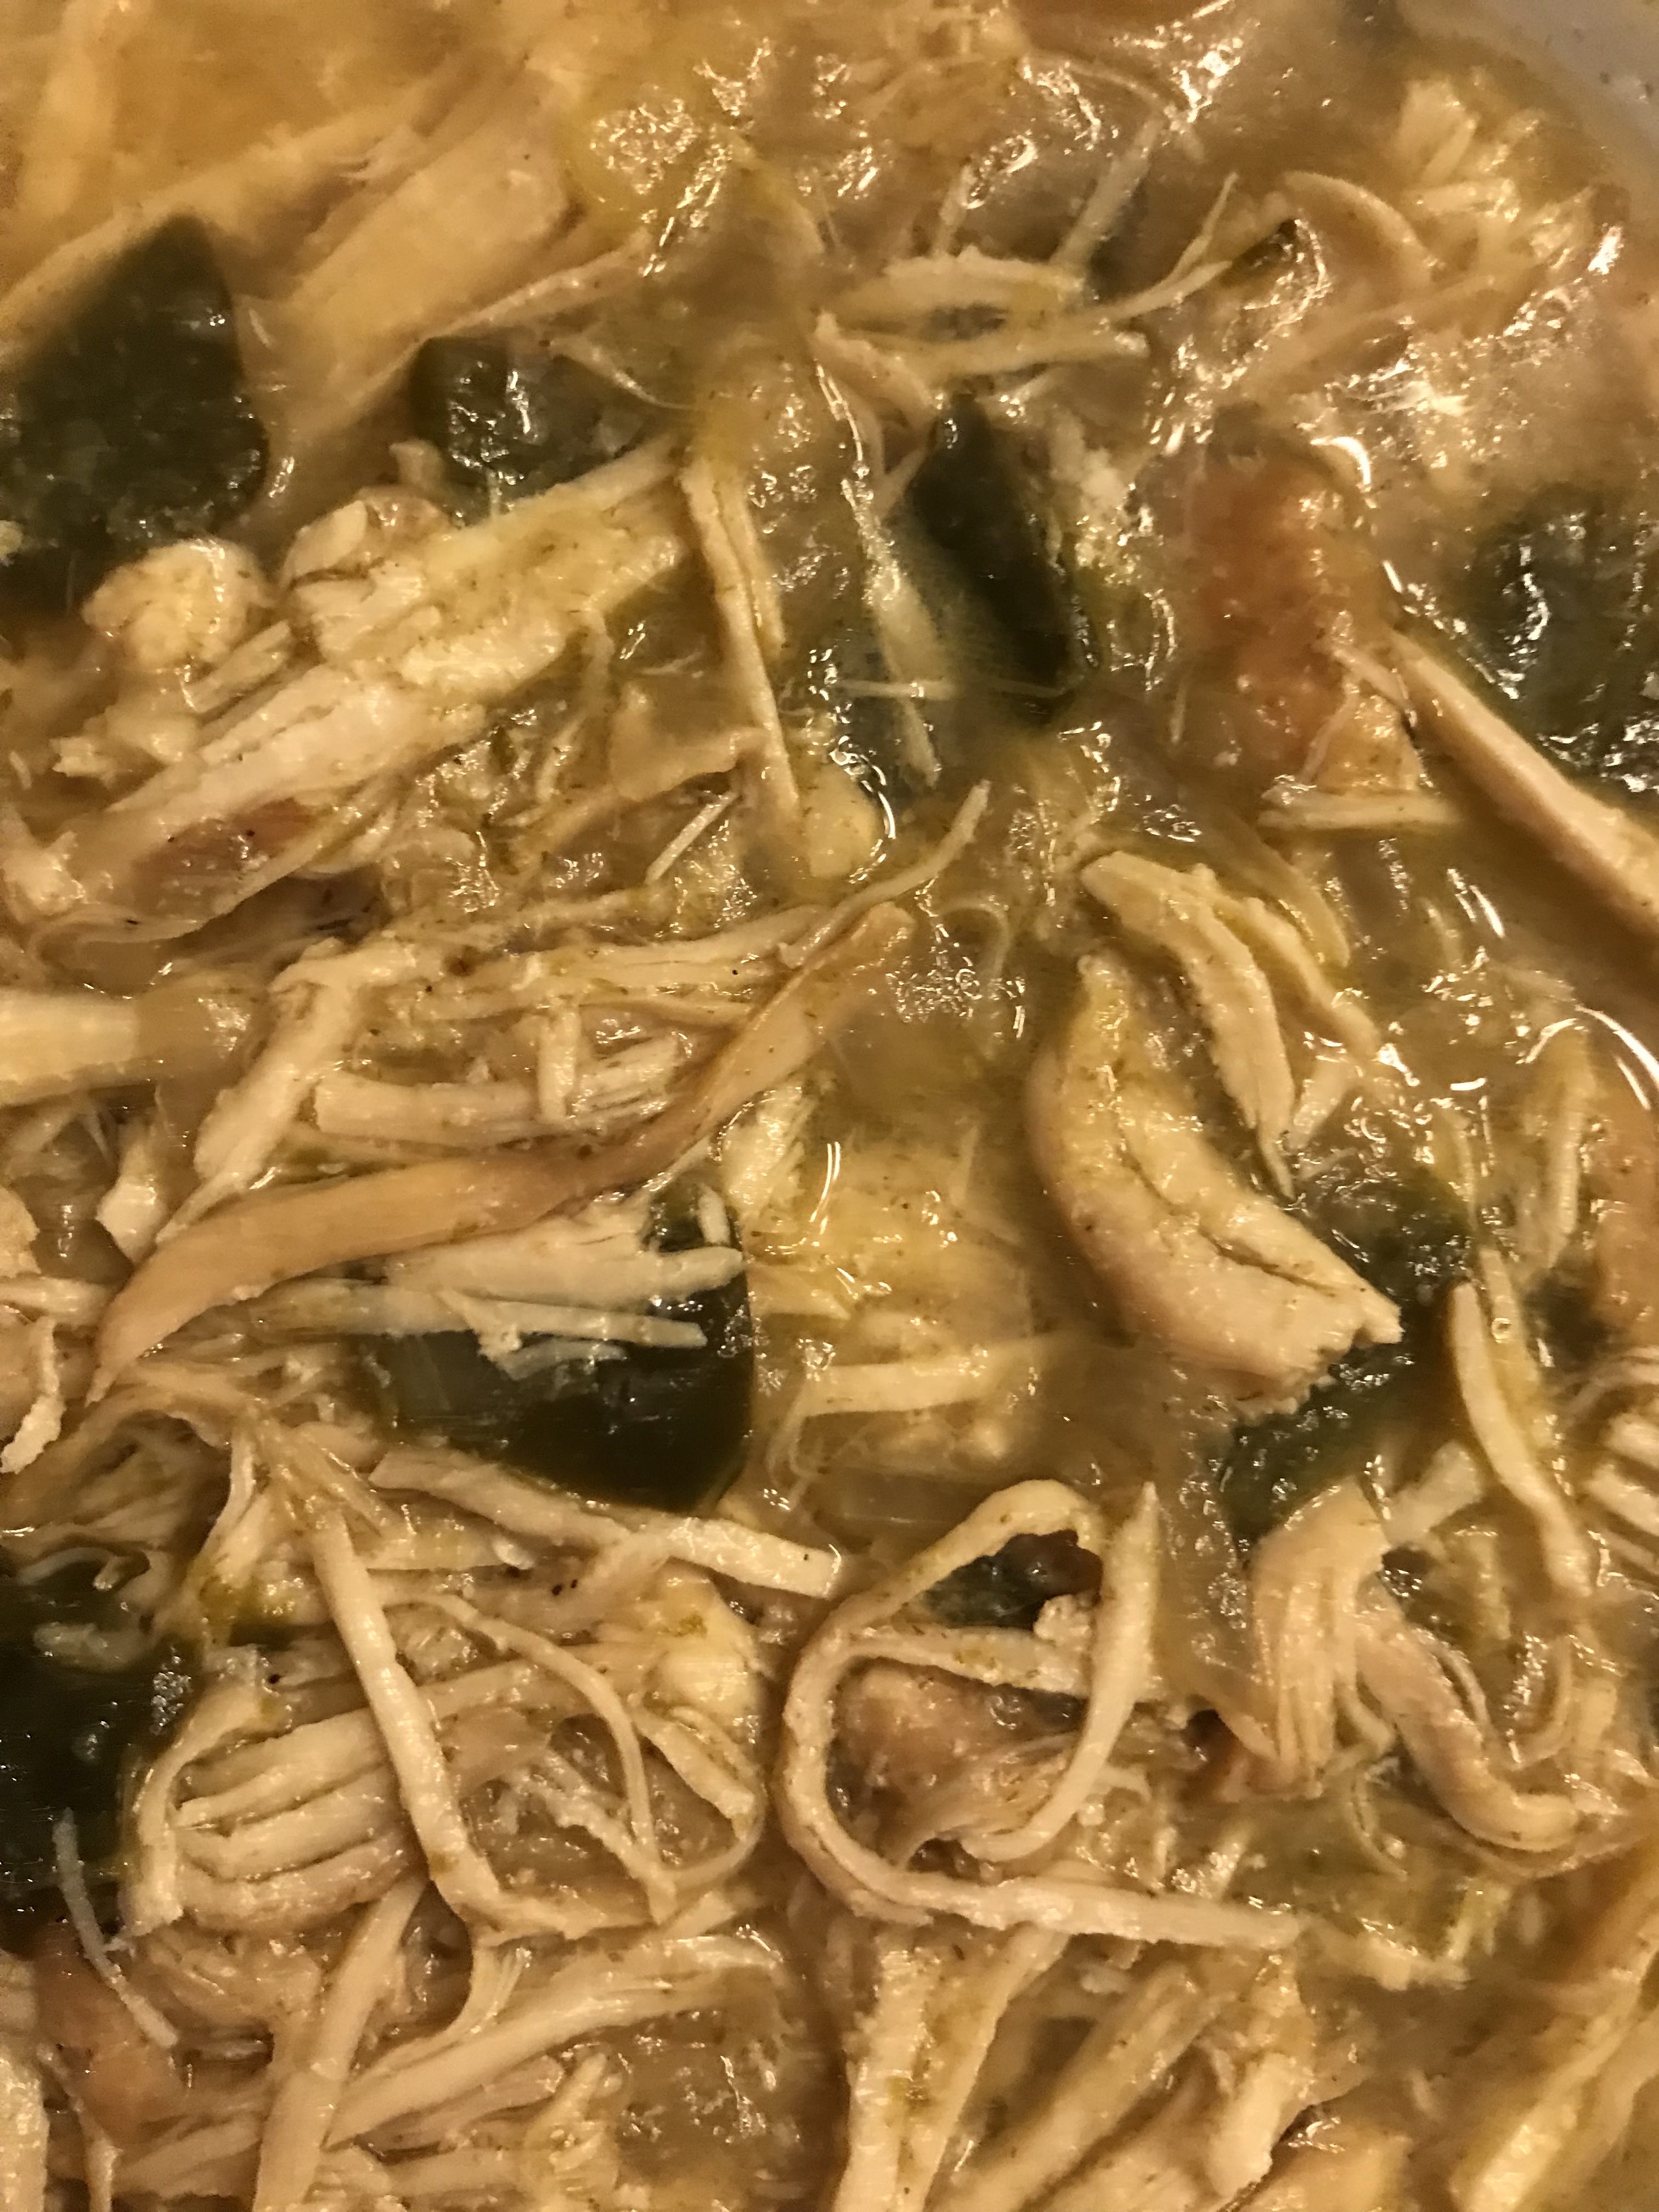
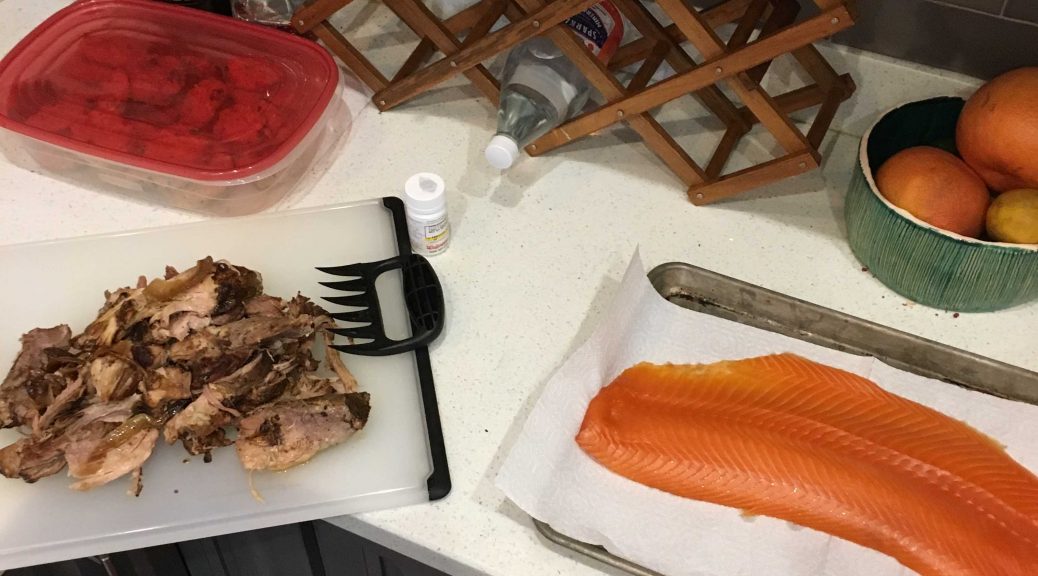
The first run featured perfectly cooked salmon and pulled pork, but the smoke flavor was definitely lacking . After looking into the ash tray I discovered that most the wood chips hadn't really caught fire. I figured out that the pan gets hot enough to make some of the chips smolder, but not hot enough to foster minion method burning. Some further inter-webbing solved that problem.  Enter the a-maze-n pellet smoking tube. While I haven't actually used the pellet smoker yet, but i found that the wood pellets** produce a ton of smoke just laying on the bottom of the larger chafing pan. I also started a few of the pellets in one corner to ensure smoke production The second run produced excellent , smokey results. I ran at 245˚ ish degrees and successfully smoked a boston butt, a chicken carcass, and some pink salt. When the a-maze-n shows up I fully indent to cold smoke cheese, tofu, and nuts (and anything else I can think of), and I'll update on how it works.


*me

**There is a mountain of information and opinion on pellet smoking / pellet composition / binders / ////// The conclusion I came to was to use 100% hardwood pellets, and what I found in my area was traeger branded pellets. The flavor was excellent. One other note on the traeger grills, I've had "smoked" meats from pellet grills that were excellently cooked with no smoke flavor. What I've read now makes sense, the pellet grills get to temperature and then maintain temperature without actually burning that much fuel. No burning = no smoke flavor. I feel pretty great that I've made something out of a rusting kettle that makes food better than the 1000$ pellet grills...

Chicken Tacos and Black Beans, Instant Pot Style

I made these two dishes over the last week, and they both ended up being really, really good.  Plus, they even go well together; I'm planning on having the leftovers from these two for my lunch tomorrow.  And I'm sure these recipes would be doable without the technological marvel that is an Instant Pot, but this is how I made them.  Plus, it gave me another reason to use the steam diverter my wife got for Christmas, which my kids call "angry daddy."  It looks pretty funny when it goes off, plus it makes it easy to turn the release valve without using a hot pad.

Chicken Tacos

(taken from here, with some small changes)

I had some leftover poblano peppers when I found this recipe, and thought I'd give it a shot.  It ended up with a bit more liquid in it than I would have preferred for tacos, but the chicken was tasty, and not at all dried out.  I'll probably try less liquid next time.  I was also worried beforehand that it would taste too much like orange juice,  but it ended up just having a hint of orange flavor.

  • 2 tablespoons olive oil
  • 2 large chicken breasts (about 3 pounds)
  • 1.5 tablespoons Kosher Salt
  • 1 teaspoons Pepper
  • 1  red onion, peeled and thinly sliced
  • 2 Poblanos, diced
  • 5 cloves garlic, minced
  • 2 tablespoons cumin
  • 1.5 cups chicken stock
  • 1.5  cups orange juice

Set Instant Pot to sauté mode, and add a little oil.  Season chicken on all sides with salt and pepper.  When oil is hot, work in batches to sear chicken on both sides, leaving it alone for long enough to get a nice brown on it (not sure this step actually did much; could probably skip it, but I could get the chopping done while the chicken was in, so it probably didn't add that much time).  Remove to a plate when they are done browning.

Add 2 tablespoons of olive oil, then add peppers and onions.  Cook 5 minutes or so, until tender.  Then, add cumin and garlic, stirring for about a minute until fragrant.  Add back in the chicken along with the stock and orange juice.

Seal up the cover, and set for 35 minutes.  When timer goes off, wait 5 minutes, then release steam.  Remove the chicken, shred it, then stir it back in to the sauce.  Serve on lightly-charred corn tortillas with lime, cilantro, cheese, guacamole, hot sauce, etc.

I didn't think of writing this up until after dinner, so I didn't take a picture of the tacos, but here's what part of the leftovers looked like:


Black Beans

(taken from here, with some adjustments)

So those chicken tacos were good, but these black beans are great.  Everyone it the family loved them.  Both of my kids ate  multiple rounds at dinner, and one said they are his favorite beans ever (which is saying something from a kid who could probably eat an entire can of refried beans by himself).  They end up tasting rich and salty, with the creamy liquid pairing with the just-slightly-al-dente beans to make a perfect texture combination.  Plus, it's super cheap and easy, and no soak required.

This is the recipe for half the original batch on the website above, which still makes a lot of beans.  They save well in the fridge, but a full pound of beans is more than we can get through in a week.

  • 0.5 pound dry black beans
  • 1.5 cups water
  • 0.5 yellow onion, sliced in rounds
  • 2 garlic cloves, sliced in half
  • 0.5 teaspoon cumin
  • 1 teaspoon salt
  • 1 bay leaf
  • 1 teaspoon worcestershire sauce

Put everything in the Instant Pot.  Seal the lid, and set if for 30 minutes. (The recipe I took this from called for only 22 minutes, but the beans were still pretty crunchy at that point, so I kept adding time and testing it, and it ended up being about 30 total.)  Let it sit for 10 minutes when the time is up, then release the steam and serve.

These beans are great on their own or with some hot sauce.  Sour cream would make some sense here, too.  They work as a side for grilled meat or tacos, as a vegetarian burrito filling,  or just on their own; a bowl of these beans makes for a pretty great lunch.

I also didn't take a picture of this when I made it, but it still looks pretty good after a couple of days in the fridge.

Blind Mole

Adventures in Instant potting: making mole chicken.

We went out for dinner this weekend with friends to the locally famous Tower Cafe, where I happened to have a very, very good plate of chicken mole enchiladas. So I had a taste for mole.

Now, "real" mole is an all-day sort of affair. There's a reason I don't make it very often (like, almost never). But with the Miracle Machine (and some cheating), just maybe I could pull this off in a reasonable amount of time.

The recipe template

The ingredients
one large (28 oz) can red chile sauce ~a dozen assorted dried chiles (I used a combo of ancho/mulato, New Mexican Brown, and Guajillo) one onion, chopped
~six cloves garlic, smushed one small can diced fire-roasted tomatoes two chipotles and some of the sauce
1/3 cup raisins 1/3 cup sliced or slivered almonds 2 tbsp cocoa powder (Valrhona not required)
2 tbsp granulated onion 2 tbsp granulated garlic 1 tsp cinnamon (omitted because the Mrs is allergic, but it's authentick)
1 tsp dried oregano 1 tbsp ground cumin about six boneless, skinless chicken thighs

The technique:

stem and remove most of the seeds from the chiles. Toast for a few minutes (3-4 max) in a medium oven to bring out their fragrance. Break apart into largish pieces and set aside. Meanwhile, put your pot on "saute". When hot, add a tbsp or so of oil and saute the onion for a couple minutes, then add the garlic and saute for a minute more. Then stir in the tomatoes and all the dry ingredients (so they don't burn, but all get incorporated), the raisins and nuts, the chipotles, the dry chiles, and then the red chile sauce. Close the lid and set to about 8 minutes on "Manual." Release the pressure, scoop the sauce into a blender and blend until desired smoothness (or use a stick blender if you like things a little more chunky; I used the Vitamix to get a mostly smooth sauce). Reserve the sauce and wash the pot out so that you don't have any residual stuff to burn while starting the chicken. This will make a lot of sauce. You could omit the canned red chile sauce and instead use maybe a cup or two of chicken stock to get a smaller volume of sauce.

Put the (dried) pot back on saute. Add some oil and brown the chicken a bit (if desired; it doesn't really matter that much). Dump the sauce on top of the chicken. Don't bother to stir it in. Put on the lid and set to about 12 minutes on "Manual" (the recipe called for 10 minutes for thighs, which I used, but that did not get the chicken as done as I would have liked). Let cool ("natural release") for maybe ten minutes, then release any remaining steam manually. Mine had very little steam to release at this stage.

Remove chicken and shred. Return to pot. Check salt and correct seasoning.

Start to finish, this took about 90 minutes, less than half the time it would have taken on the stovetop. The sauce could have used more sweetness to balance (more raisins, maybe a touch of sugar) and the cinnamon. Sauce also needed some salt.

Serve with tortillas, chopped onion, sour cream, chopped cilantro, your favorite cheese for tacos, and a side of beans (I made Peruanos, which come out a creamy tan color, lighter than pintos in color and flavor -- these are often the paler refried beans you get at Mexican restaurants). And a beer or sangria or margarita.

The Best Hot Cocoa Mix

So what do you do with that leftover fancy cocoa powder you bought to make that delicious, Nutella-esque chocolate and peanut concoction? You make your own cocoa mix! And trust me, this is waaaaaaaay tastier than that stuff you buy at the grocery store.

Ingredients
1/2 cup (100 grams) granulated sugar
1 tablespoon (8 grams) cornstarch
3 ounces (85 grams) bittersweet chocolate, roughly chopped
1/2 cup (40 grams) Valrhona cocoa powder
1/4 teaspoon vanilla extract
1/8 teaspoon fine sea salt

Combine all ingredients in a food processor and blend until thoroughly pulverized.

Before pulverization:

After pulverization:

To use (stovetop version): Heat one cup of milk in a saucepan over medium heat until it begins to steam. Add 3 tablespoons cocoa mix. Whisk over heat for another minute or two, until it begins to simmer and mix is completely dissolved. (Obviously you can make more than one cup at a time, depending on how many people you're serving.)

To use (microwave version): This mixes together better if you heat the cocoa mix with the milk rather than mixing it after the milk has been heated. Measure 3 tablespoons cocoa mix into one cup of milk but don't bother stirring it. Heat for 90 seconds and then stir vigorously. Then heat for 20 more seconds or until cocoa is at desired temperature. (Aside: my microwave is pretty wimpy, so you may want to reduce these times if you are using a more powerful model.)

Bonus tip--I store my cocoa mix in a container with the measurements noted on it to make life easy:

Recipe source: Smitten Kitchen

Pepper Butter

If I make peanut butter, it should logically be called Pepper Butter, yes?

With that important matter taken care of, here's what you need to know: assuming you own a food processor, this is insanely easy and also delicious. Roasting the peanuts is key to getting fantastic flavor, and I love that you can tweak the amount of salt and honey to get exactly the flavor YOU like best.

Ingredients
15 ounces shelled and skinned raw peanuts
1 teaspoon kosher salt
1 1/2 teaspoons honey
1 1/2 tablespoons peanut oil

Directions
Preheat oven to 400°F. Spread peanuts on a rimmed cookie sheet. Roast for 10 minutes. Remove and let cool for about 10 minutes.

Place the peanuts, salt, and honey into the bowl of a food processor. Process for about 5 minutes. The mixture will look dry and rather dough-like for the first few minutes, but keep going. Eventually, like magic, it’ll liquefy. Scrape down sides of the food processor. Place the lid back on and continue to process while slowly drizzling in the oil and process for another minute or so. Taste and adjust salt, honey, or oil if needed. (A little extra oil helps if it’s not quite as smooth as you’d like.) In my first attempt, I added a little more honey and oil.

Place the peanut butter in an airtight container (I used a mason jar) and store in the refrigerator for up to 2 months.

Adapted from here.

Instant-aneous Indian: Instant Pot Shrimp Biryani

Bonus Appetite post this month. I heard an interview with Urvashi Pitre ("The Butter Chicken Lady") recently and saw a recipe on the NYT for pressure cooker shrimp biryani that she swore would taste authentic and take mere minutes. She was right on both counts.
mis-en-place
Biryani on the stovetop takes a long time and a lot of prep. This version is quick and easy, once the (not so lot of) prep is done.
1. Soak 2 cups of your favorite long-grain rice for at least 30 minutes in water to cover by 2 inches or so. I used basmati, but jasmine would work well too. When you are ready to start sauteeing the veg, drain and rinse the rice and set aside.
2. Chop an onion
3. Finely chop about a tbsp of ginger and 3-5 cloves garlic
4. I wanted more veg than the recipe called for, so I cut a handful of green beans into 1-inch lengths and chunked a half of a yellow pepper and seeded/chopped a jalapeno (use a serrano for more bite). Even more veg would be good.
5. One small can of diced tomatoes, with juices.
6. Spices: a tsp of black mustard seeds plus 3-4 crushed green cardamom pods in one container. In another container: 1 tsp each turmeric, hot chile powder (such as cayenne; I used an Indian chile; use to taste if you don't like super spicey, although this amount did not make the dish hot, per the Mrs, who is not a chile head), smoked paprika, and granulated garlic, plus 1 tbsp kosher salt and ten fresh curry leaves, torn into small pieces (this is an optional, as curry leaves can be hard to find).
7. 1.5 cups boiling water.
8. Juice of a lime plus wedges for garnish
9. A half cup or so of chopped cilantro for garnish.
10. At least a dozen extra large or jumbo shrimp (I used 21-25s, which worked fine; bigger would be even better), peeled and deveined. At least 3-4 per serving. This amount of rice will easily serve 4-5 as a main course. Mine were frozen, so I had to thaw. They were very cold still when they went in, which probably helped them not over-cook.

Technique.
1. Put the Miracle Machine on "saute" to get hot, then add a nub of butter (I used about an ounce) and a tbsp or so of oil. When the oil is hot, add the cardamom and mustard seeds. Let sputter for a few seconds, stirring, then add the onion and saute for 3-4 minutes.
2. Add the veg and saute for a minute or so.
9. Add the ginger and garlic and stir for a few seconds.
10. Add the remaining spices and stir for a few seconds until fragrant.
11. Add the boiling water. Scrape the bottom of the pan to loosen any fond.
12. Add the rice, shrimp and tomatoes. Stir briefly, then put the lid on. Set to manual, high pressure for THREE MINUTES. I actually added the rice, stirred in the tomatoes, then put the shrimp on top.
13. When the timer goes off, do a manual release (mine did not even release any steam!), remove lid and stir in the lime juice. Turn off the machine. Put the lid back on and let rest for five minutes.
14. Serve. You can stir in the cilantro or use it for garnish if you have some cilantro haters.
15. Enjoy.

Start to finish, this took about 30 minutes.
shrimp biryani

French Onion Soup, the easy(ish) way.

As I said last night I'm not really a soup kind of person. Though, now that I think about it I actually have become more of a soup person over the years. We make a green chili stew when it's not hotter'n the blazes - which here is like 2 months of the year - and I'll order pho over bun every day ... and we've been making this white bean and corn soup ... and we've been making crab and corn bisque ... I'm a soup guy? That doesn't line up with my self image. anywho ...

This is lifted from America's Test Kitchen

4lbs onion - yeah, seems like a lot ... it isn't
3 tbs butter cut into three slices
1/2 cup dry sherry
2 cups of water plus additional for deglazing
4 cups of chicken broth
2 cups of beef broth - I used better than broth - its my secret weapon for beefy magic flavor
4 sprigs of fresh thyme
1 bay leaf
crusty baguette
shredded gruyere

Method:
Cut onions in half through the roots, and slice pole to pole in 1/4 inch slices. Preheat oven to 400˚. Put onions into a well oiled dutch oven, top with butter and a 1/4 tsp salt. Put dutch oven in oven covered for an hour. (their method has you then take the pot out of the oven and stir the onions, replace the pot in the oven with the lid cracked for another 1.5 to 1.75 hours- I just cranked up the heat on the burner and stirred the onions to keep them from burning. You're looking for the liquid to evaporate and for the pot to run dry. When a dark crust begins to form on the bottom of the pan add a quarter cup of water to deglaze the pan. Continue to run the pot dry several times until the onions are dark brown - but not burnt! - and are beginning to break apart. the last time you deglaze the pot use the 1/2 cup of dry sherry and cook until the liquid evaporates. Add the water, stock beef broth (or better than broth), bay leaf, and thyme stir to combine, and then bring to a boil and simmer for 30 minutes. Slice the baguette into thick slices and bake dry in the oven - drying these out will improve the crunchy texture of the crust when they're submerged into the soup - once dry top with shredded gruyere and broil until the cheese is bubbly and golden brown on top. Serve in a deep bowl with cheesy bread dunked into the bowl.

This was phenomenal. The hardest part is standing over the pot making sure the onions don't burn.

Brown Bag Nation

Let’s talk about lunch. Yes, you might just be eating breakfast right now, either at home, or at work, or in your car (I hope not). Bear with me.

I love to eat from the food carts on the pedestrian mall outside my institution's main library. Where else can I get loaded beef & plantain arepas, ayam bakar in a luscious peanut sauce (extra sambal kecap, please) with acar, sticky gua bao, fresh fried falafel, and other decadent morsels within a twenty-yard radius? My wallet doesn't love it quite the same way. Since I apparently have horrible career management skills, that doesn't appear likely to change anytime soon.

So, since I'm likely to get hungry sometime between 0930 and 1630, I bring food from my domicile to my roboticile — almost always supper leftovers from the previous night or two.

For years, I've packed my lunch in a small (approximately 2 cup) Pyrex dish & reusable storage bags, but recently I've felt like trying something new, ideally more compact or space-efficient. Part of my motivation is that the Poissonnier has joined Mrs. Hayes & I as a public transit companion. Part of it is the feeling that I keep rolling the dice with the Pyrex, hoping it won't leak. (I've had the occasional dribbles, but nothing catastrophic.)

I've looked at the various Zojirushi Bento products. They seem pretty nifty, but potentially cumbersome. (I suspect they won’t fit in my Tom Bihn Co-Pilot.) I don’t need the thermal capabilities often, but absolutely require spill-proof storage. The Wirecutter likes insulated lunch bags, which doesn't solve the problem of what to put in that bag; also, I don't want to carry a second bag.

Maybe I missed something, but I don't remember us discussing this before. So, I'm curious — how do you transport your vittles from your coolerator to the place where you spend most of your day reading the WGOM? And, more importantly, what [sniff sniff] do you like to pack?

Curry Chicken Pot Pie

By popular demand, here is an improvised version of curry chicken pot pie.

The good doctor requested fall food because the outside air temp dropped below boiling. We had a curry in London that resembled super smooth butternut squash soup with chicken bits, and decided that we could make that happen at home. After several attempts we discovered that we were missing some fat source be it cream / butter / ???. We shelved the recipe in favor of a Korma recipe that is always solid only to return to the idea when the weather turned cool(ish). To do this you'll need:

cubed butternut squash
cubed sweet potato
diced carrots
peas
a toe of garlic smashed
a small hand full of raisins
diced chicken parts (we used breasts, though thighs would def. amp up the flavor values)
curry seasoning (make your own if you feel sassy)
nutmeg
a bay leaf
salt and pepper
pie crust (if you make your own then you win) (trader joes is pretty alright, pilsbury is more than alright)
pyrex or similar oven safe bowls (though some consumer groups say that pyrex aint what it used to be... so be careful when dealing with wild temp swings and glass cookware)

The ratios of this are really not hard math, I used a bag of butternut squash cubes from trader joes (because lazy), 4 carrots, two small sweet potatoes from my garden. I roasted half the veg to roast, and half the veg for the sauce. I ended up with thee of the 2 cup pyrex individual pot pies. I used the left over crust to make a flower top for decorative / more pie crust goodness

Method:

I roasted half the sweet potato and butternut squash along with the carrots to add flavor / texture dimension to the final product. I tossed the veg with a little olive oil, salt, pepper and curry powder prior to roasting in a 450 degree oven. I removed the veg when brown / starting to blacken on the edges (about 25 minutes). I dumped a handful plus of frozen peas onto the roasting pan after I removed it from the oven (both arrests the cooking of the veg and thaws the peas). While the veg is roasting I add the remaining butternut squash and sweet potato (you can also add some carrot / parsnips) to a 2 quart sauce pan with just enough water to cover, plus salt and pepper and a dose of curry seasoning, and bring to a roiling boil. Boil this mixture until the veg falls apart, and mash in the pan. At this point the liquid in the pan should be fairly runny. Add the diced chicken parts to the pan with another dose of curry seasoning, the bay leaf, a pinch of nutmeg (my secret weapon...) and the smashed garlic toe. Simmer until the chicken in cooked through and the sauce is thickened to your desired taste. Add the roasted veg + peas + a handful of raisins to the pot and simmer out any additional liquid. As this happens have your oven preheated to 425 (YMMV). Portion out your sauce / chicken / veg mix into your baking dish(s), and cut your pie crusts to hang over the edges. Cut some vents and bake until the crust is golden brown. (an egg wash will help with browning, but isn't necessary for flavors). Basically this is a boiler plate for seasoned chicken pot pie with no dairy. You could use (gasp) tofu, ginger, lemongrass, green thai curry etc etc etc etc as flavor enhancers.

you're welcome.