Category Archives: The Nation Has An Appetite

Apple Jelly … Made With Apples & Stuff

I was going to recap my Wet Hop American Session Ale with homegrown Cascade hops when I realized that cheaps was likely doing brewing post for the old fundraiser

/checks drafts, smiles knowingly/

so I decided to reach back a year to my first run of jelly making.

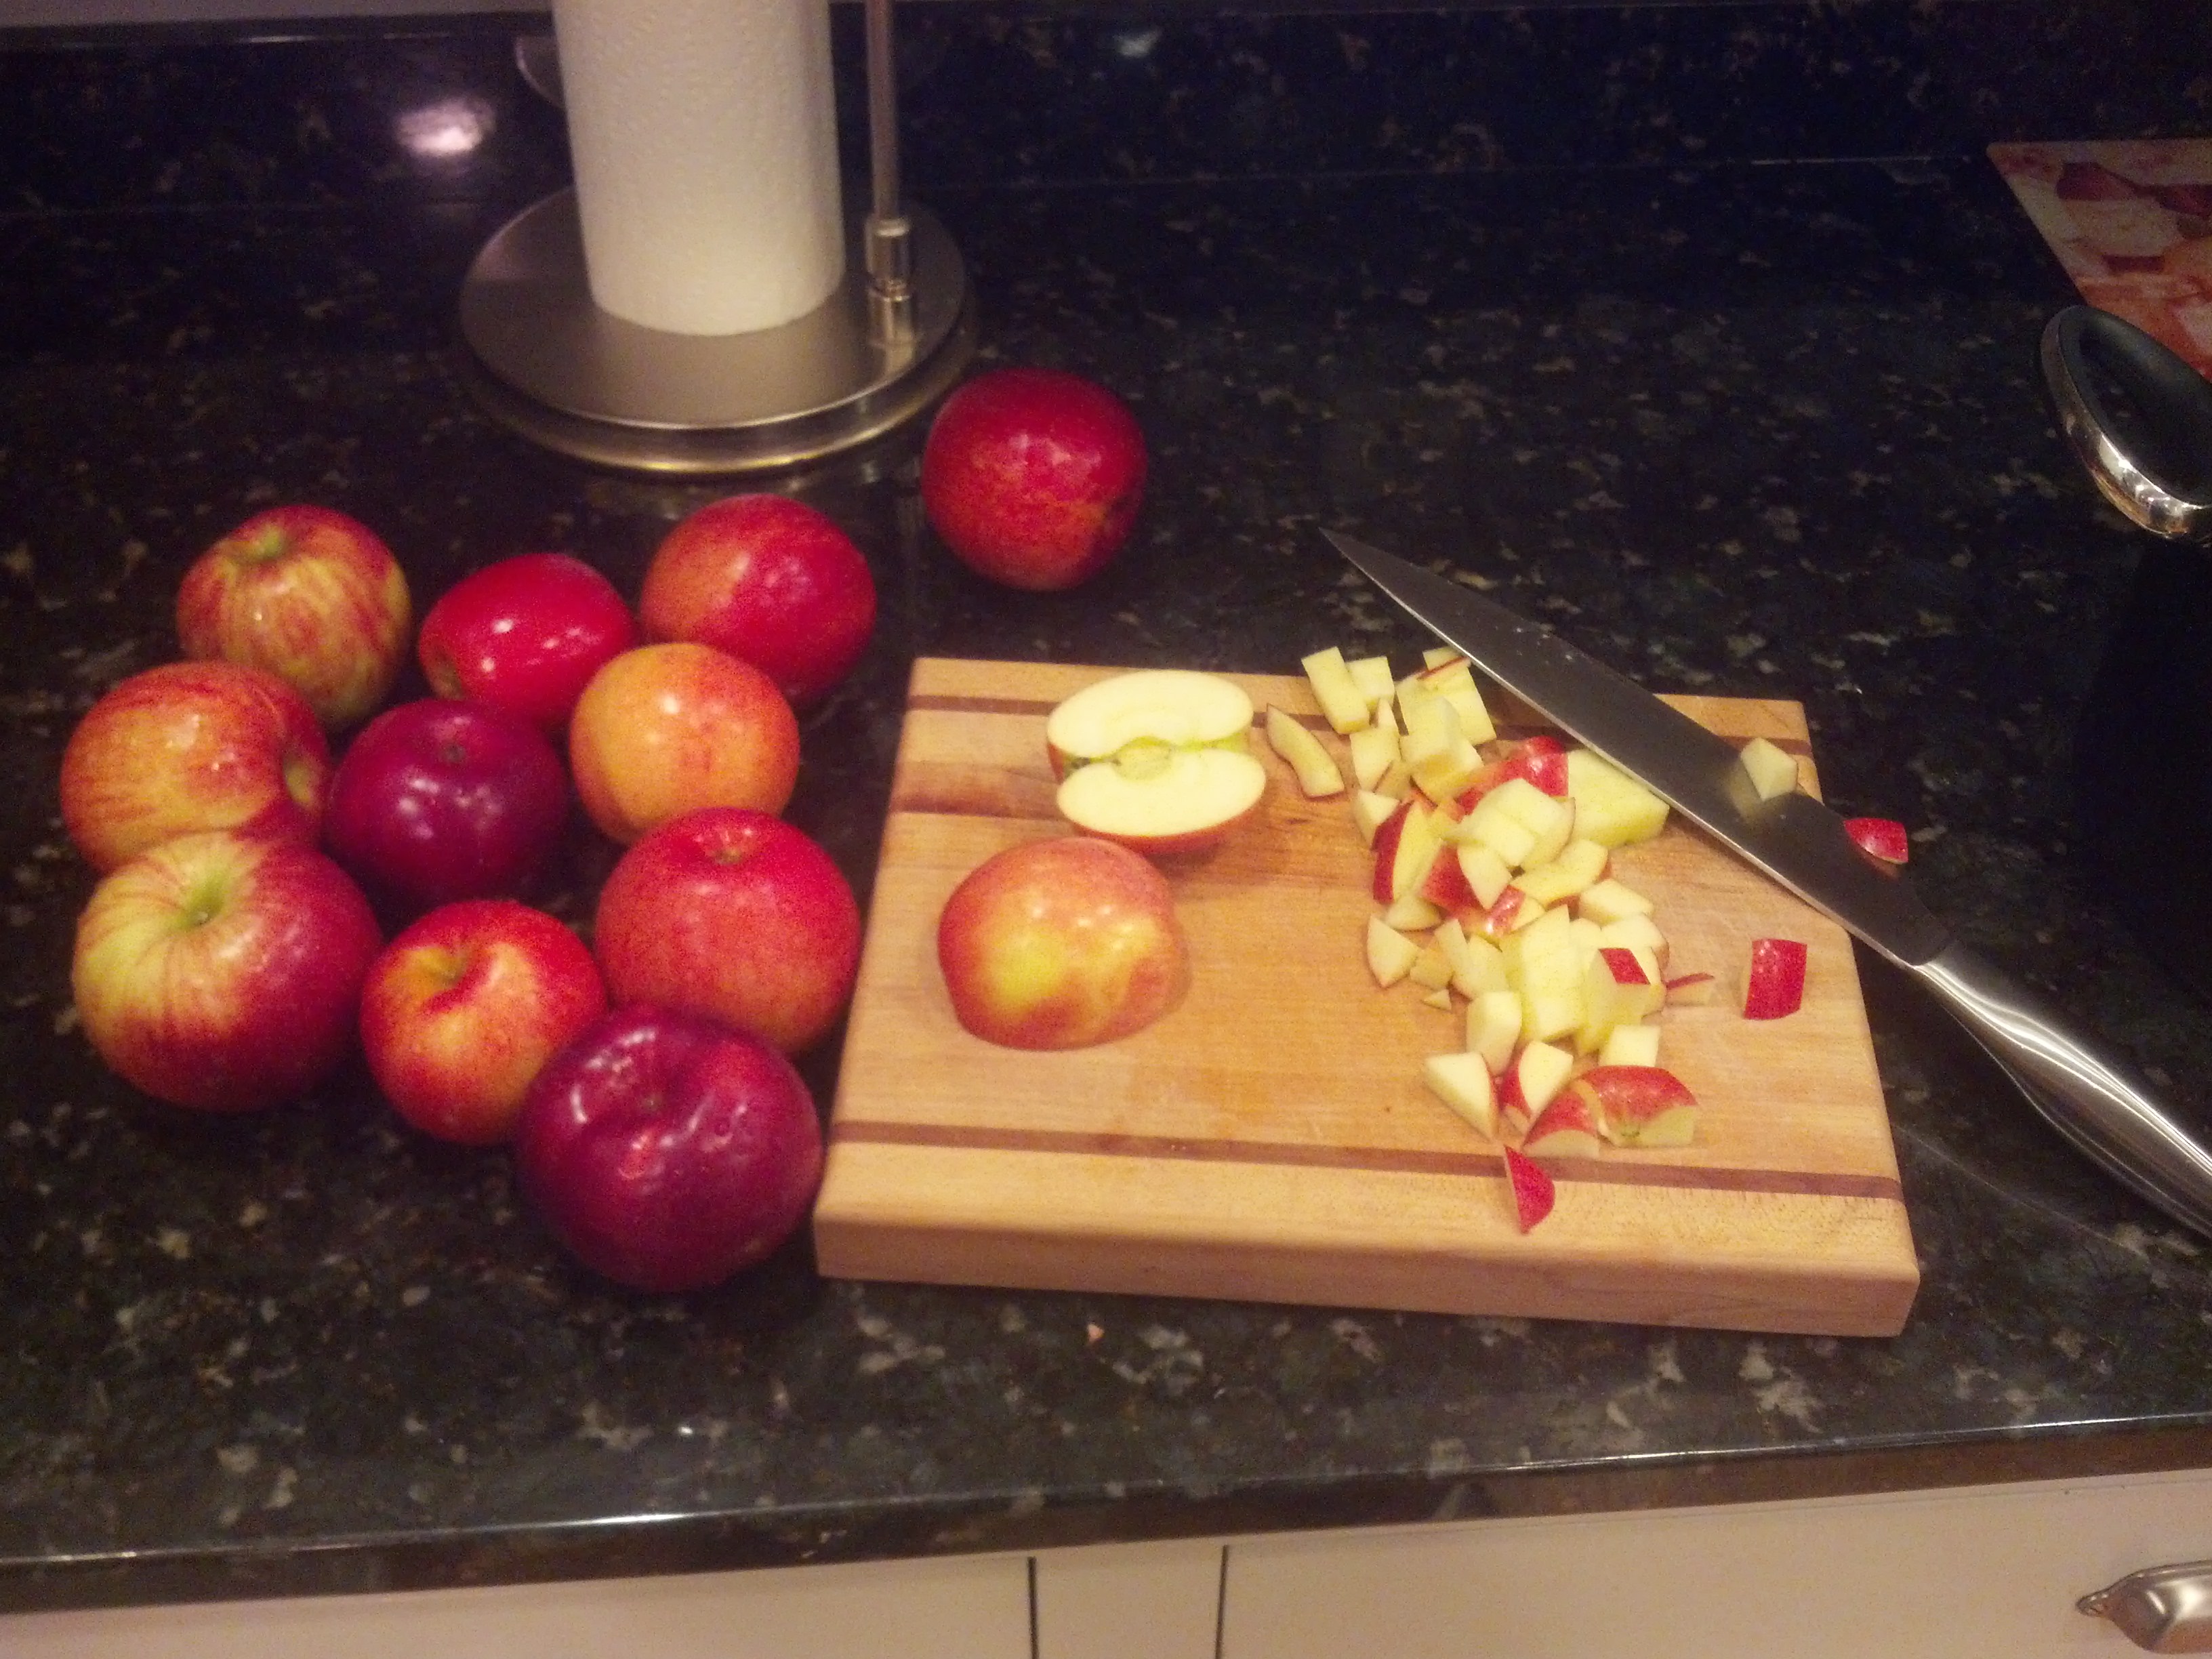
I've canned a lot of the typical stuff: salsa, cucumbers, pasta sauce, garlic dilly beans, peppers, strawberry rhubarb jam, etc., but I'd never tried jelly before. While at the apple orchard with the family, I noted $8 bottles of apple jelly and thought, "I wouldn't mind some apple jelly, but I ain't paying no $8 for a pint!" Instead, I bought 4# of McIntosh & Fireside apples and hauled 'em home to give her a go.

I used the apple jelly recipe from my favorite canning cook book: Put 'Em Up! A Comprehensive Home Preserving Guide for the Creative Cook  by Sherri Brooks Vinton.

Ingredients:

  • 4# Apples
  • Approx. 4 Cups Water
  • 3 Cups Sugar
  • 1/2 Cup Bottled Lemon Juice

Step 1 

Wash & stem the apples leaving the peel and core. Roughly chop and put into a large stockpot.

img_20141103_211139_556

Step 2

Add enough water to barely cover the apples, bring to a simmer and cook until tender, about 30 minutes.
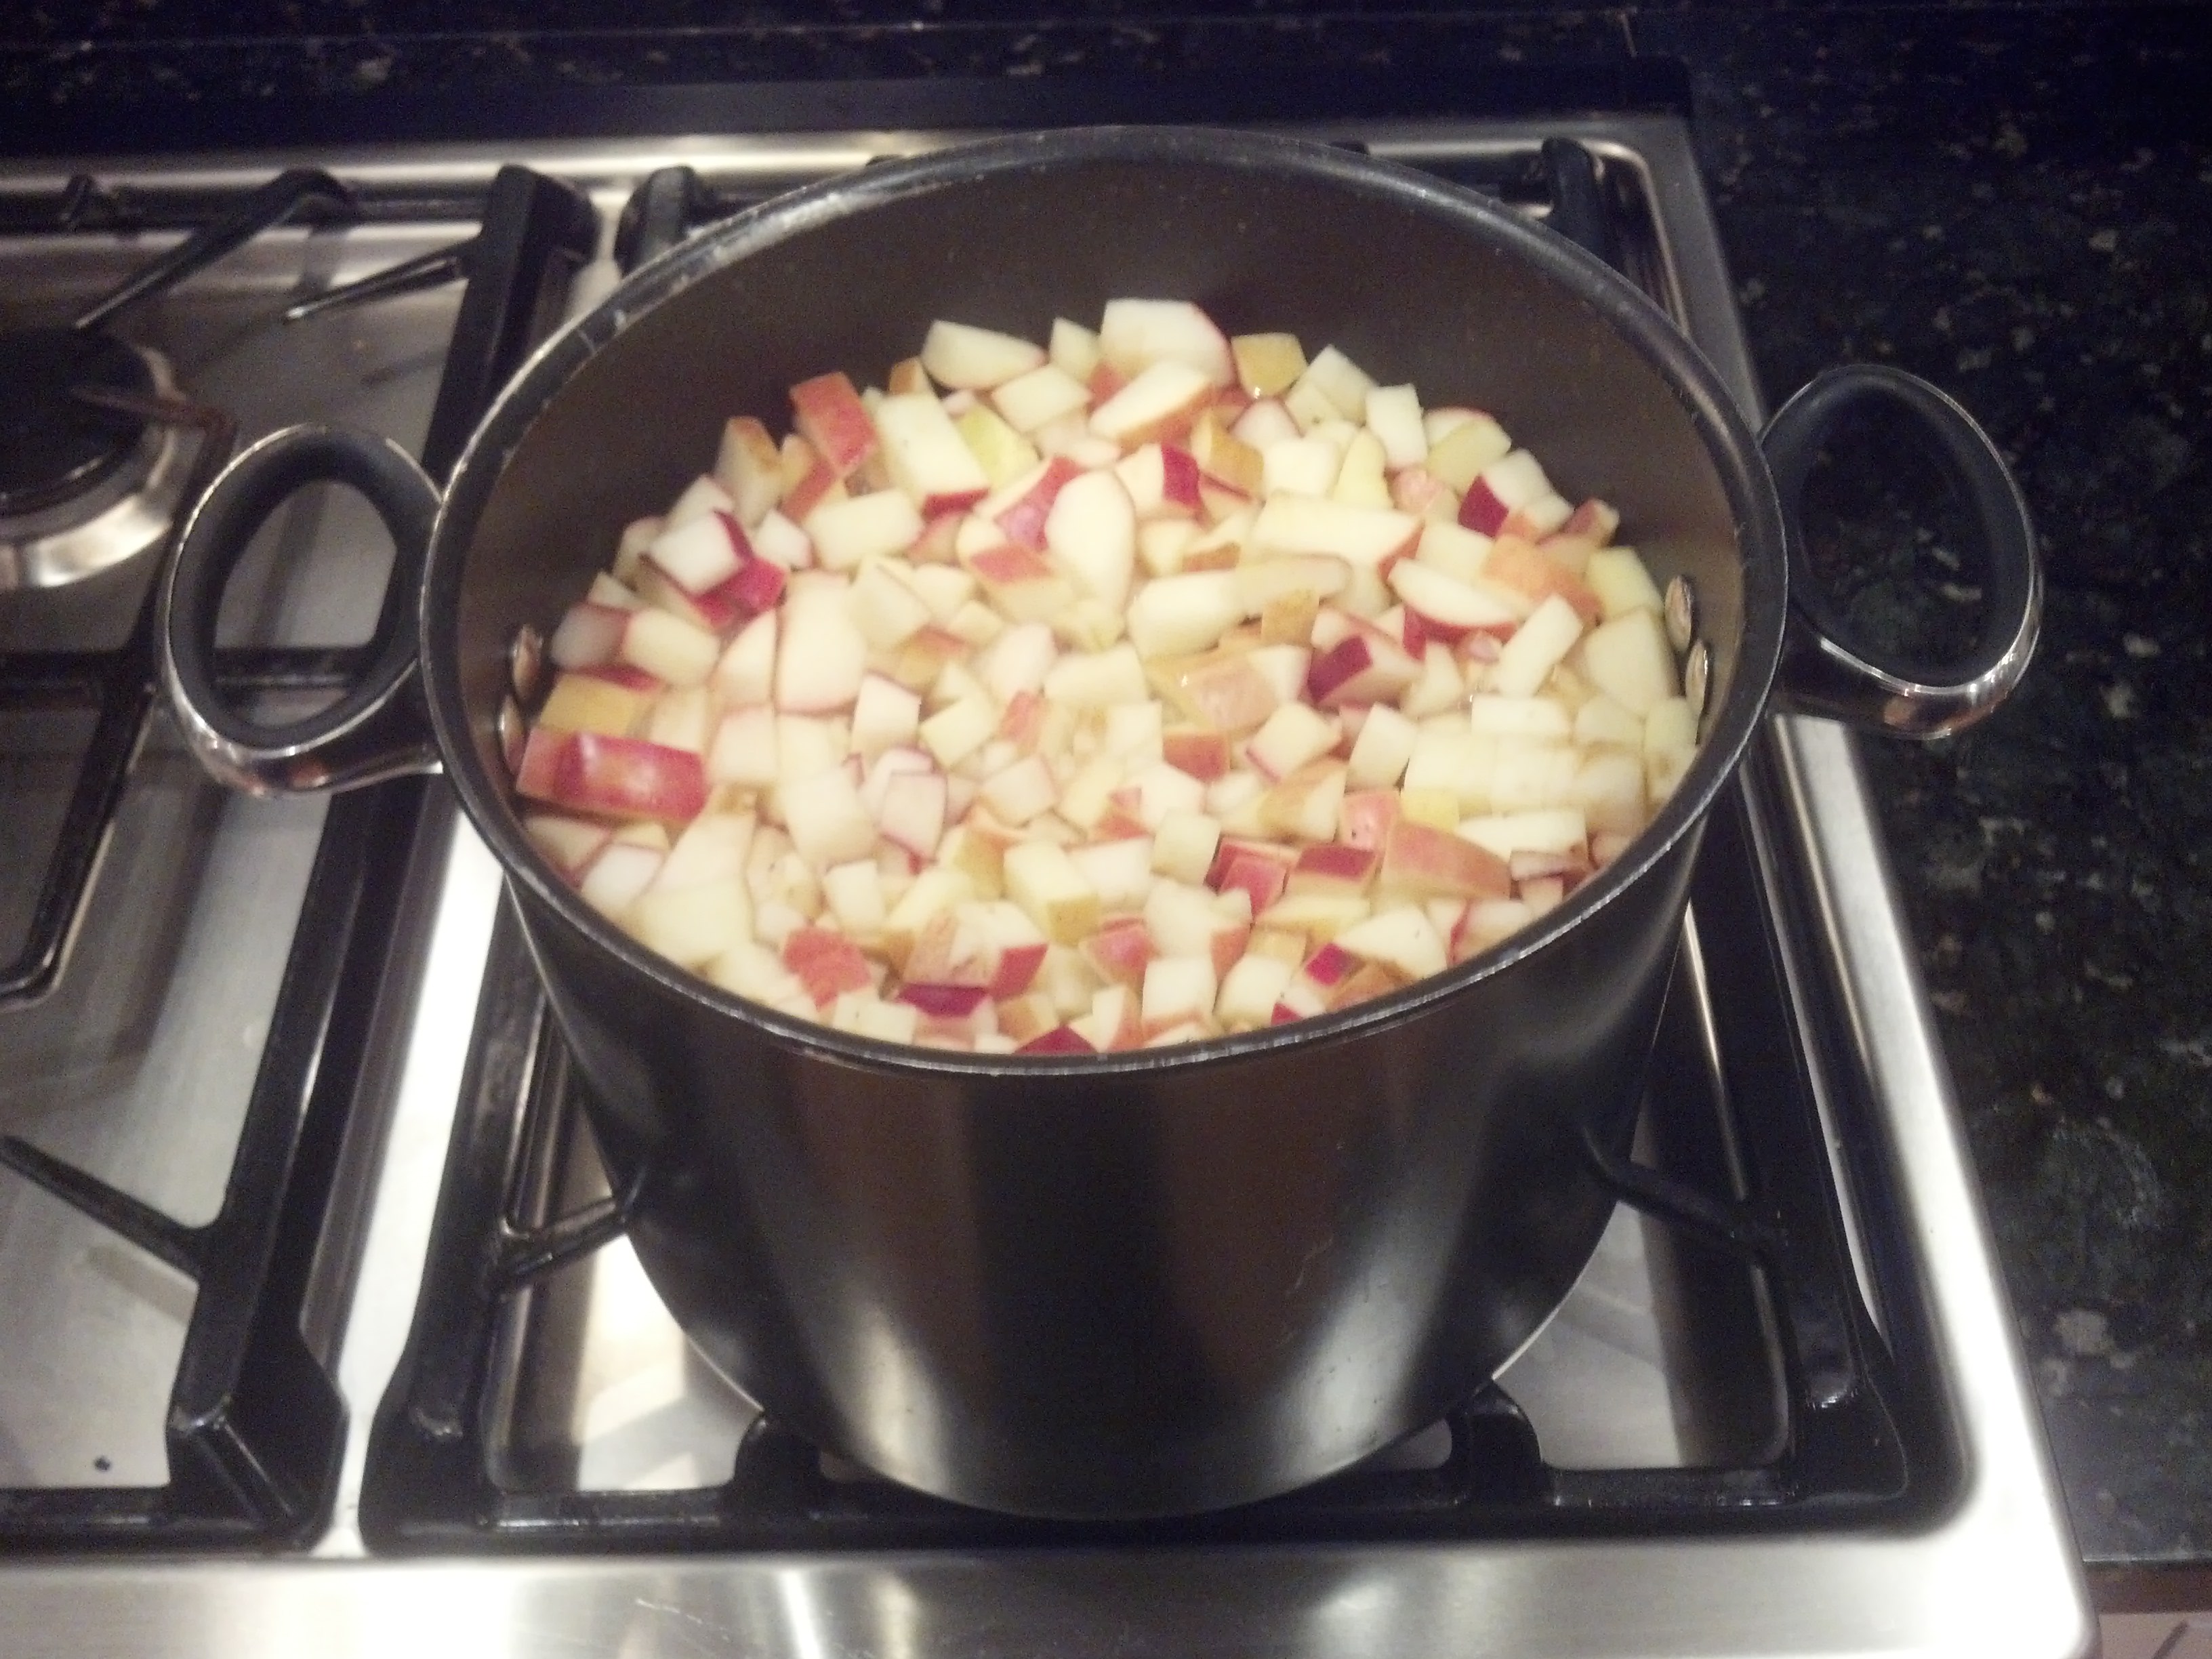
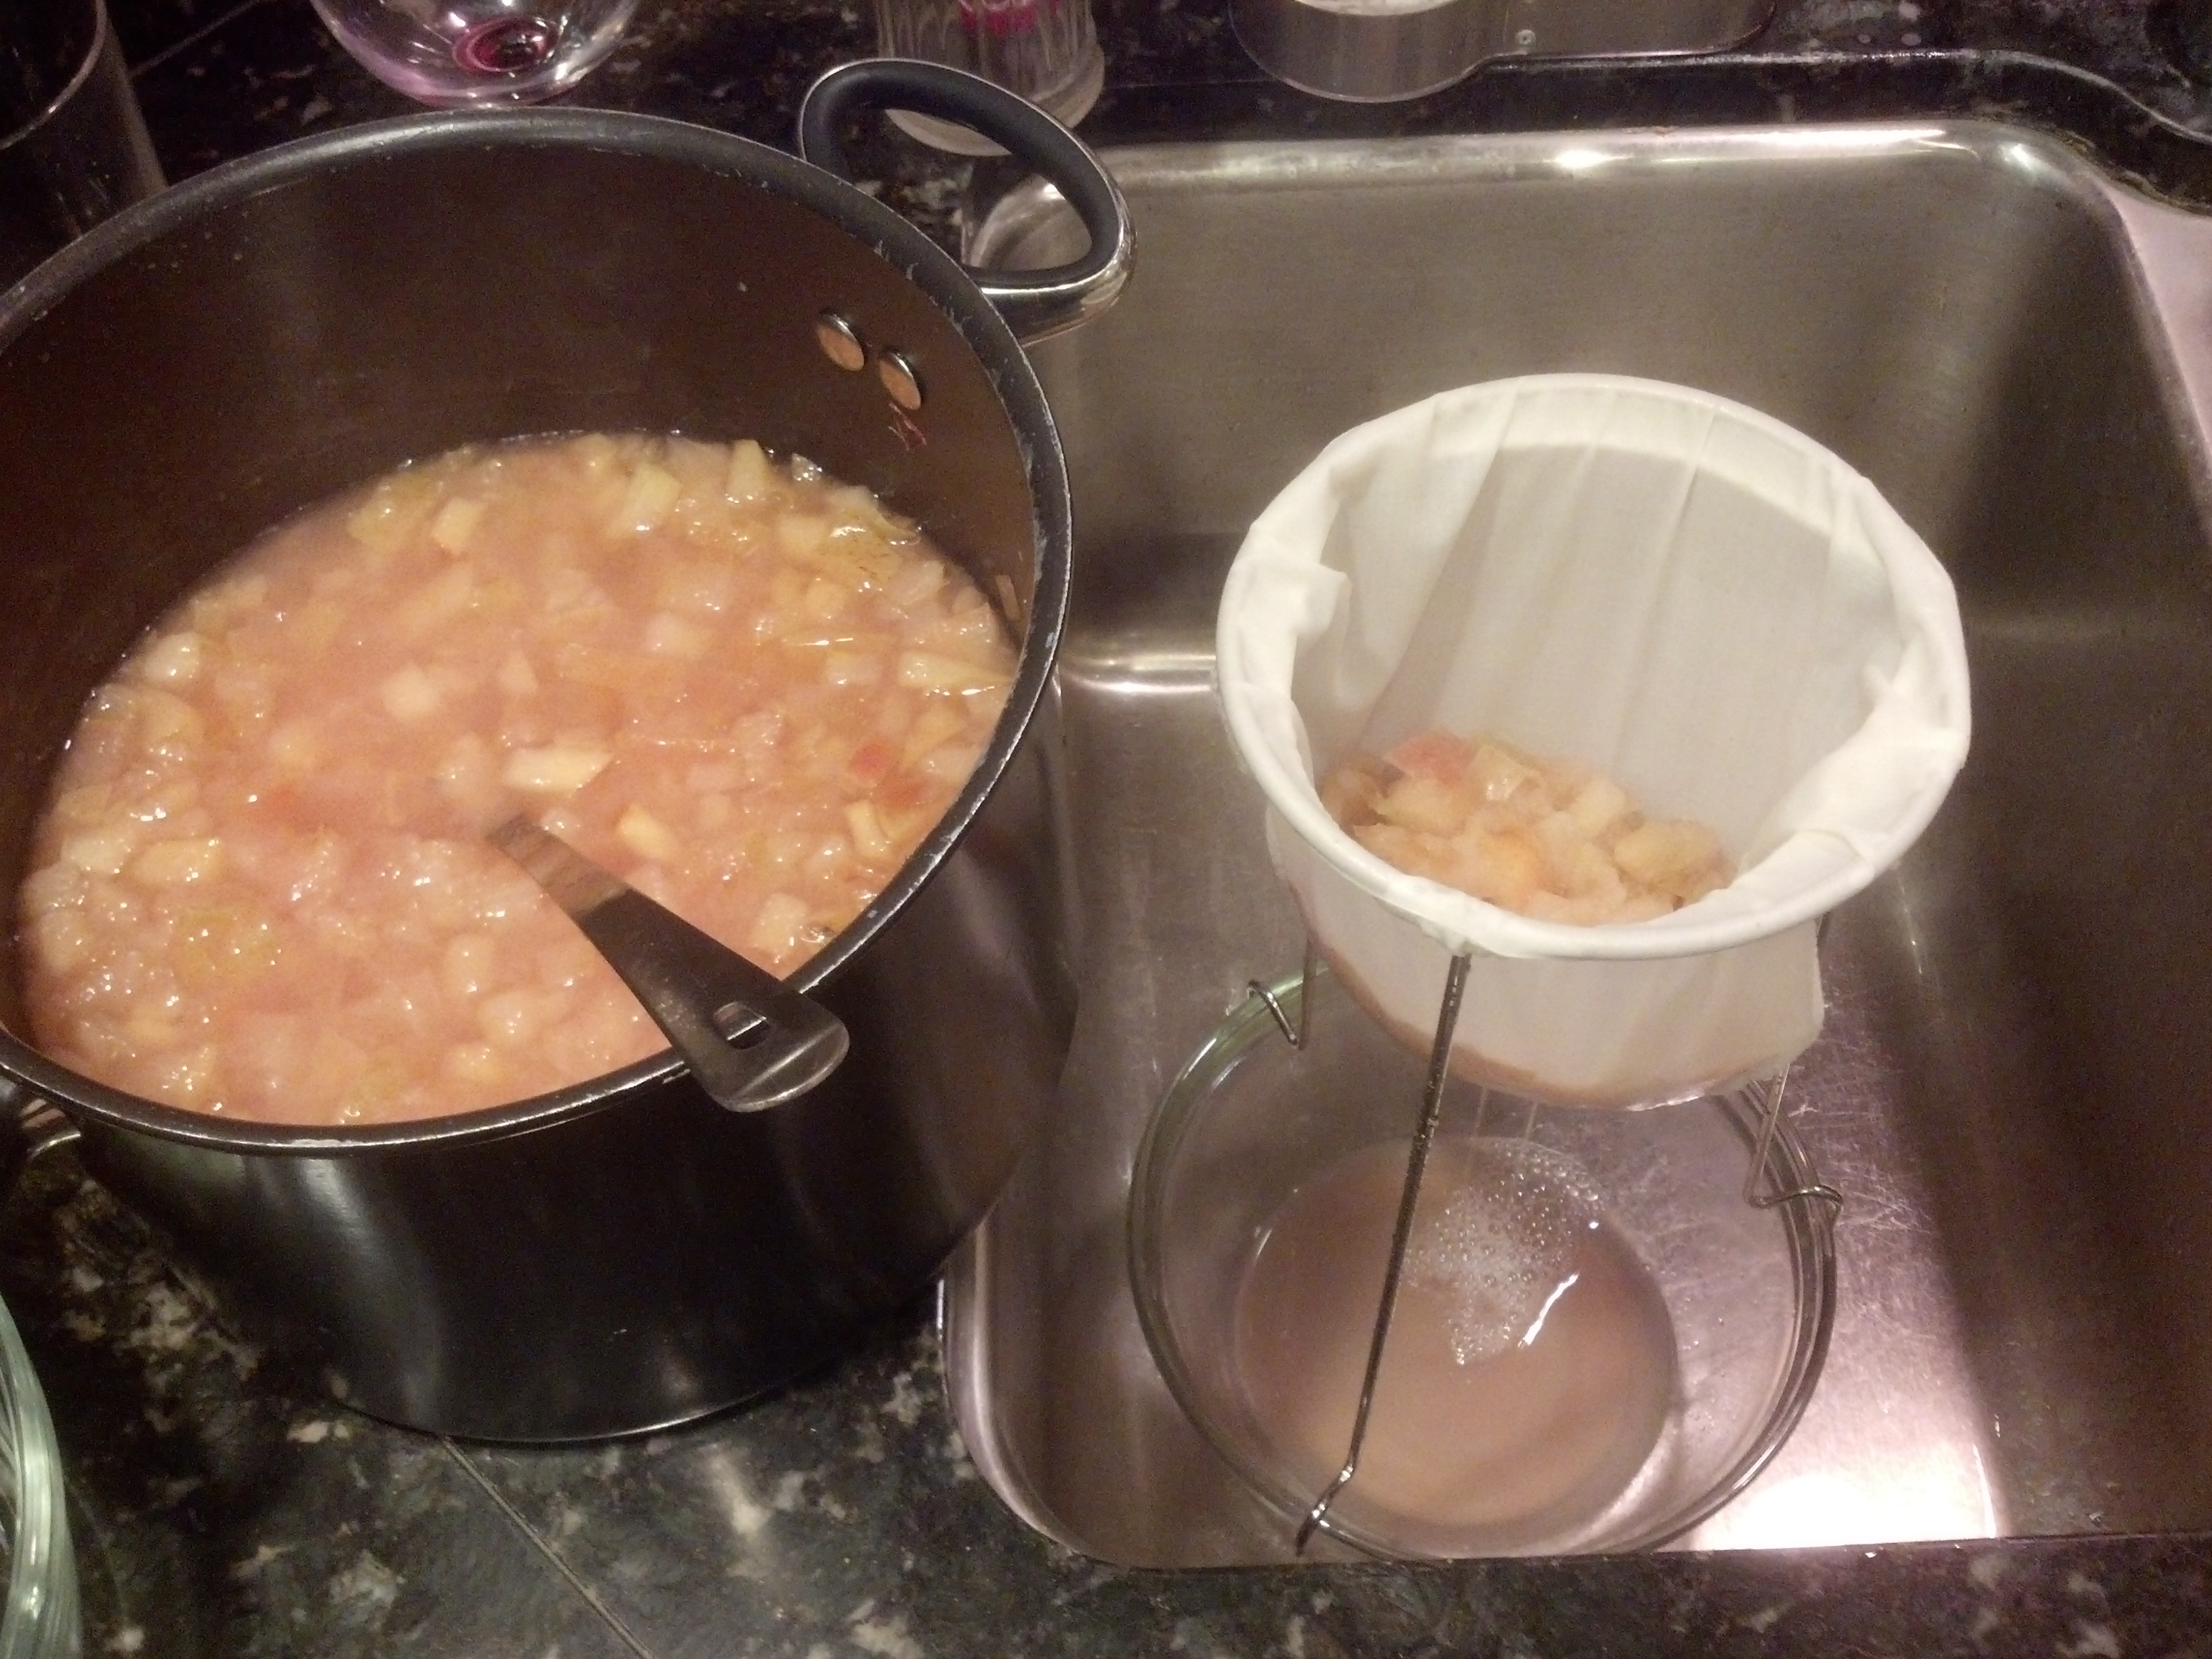
 img_20141103_214224_427

Step 3

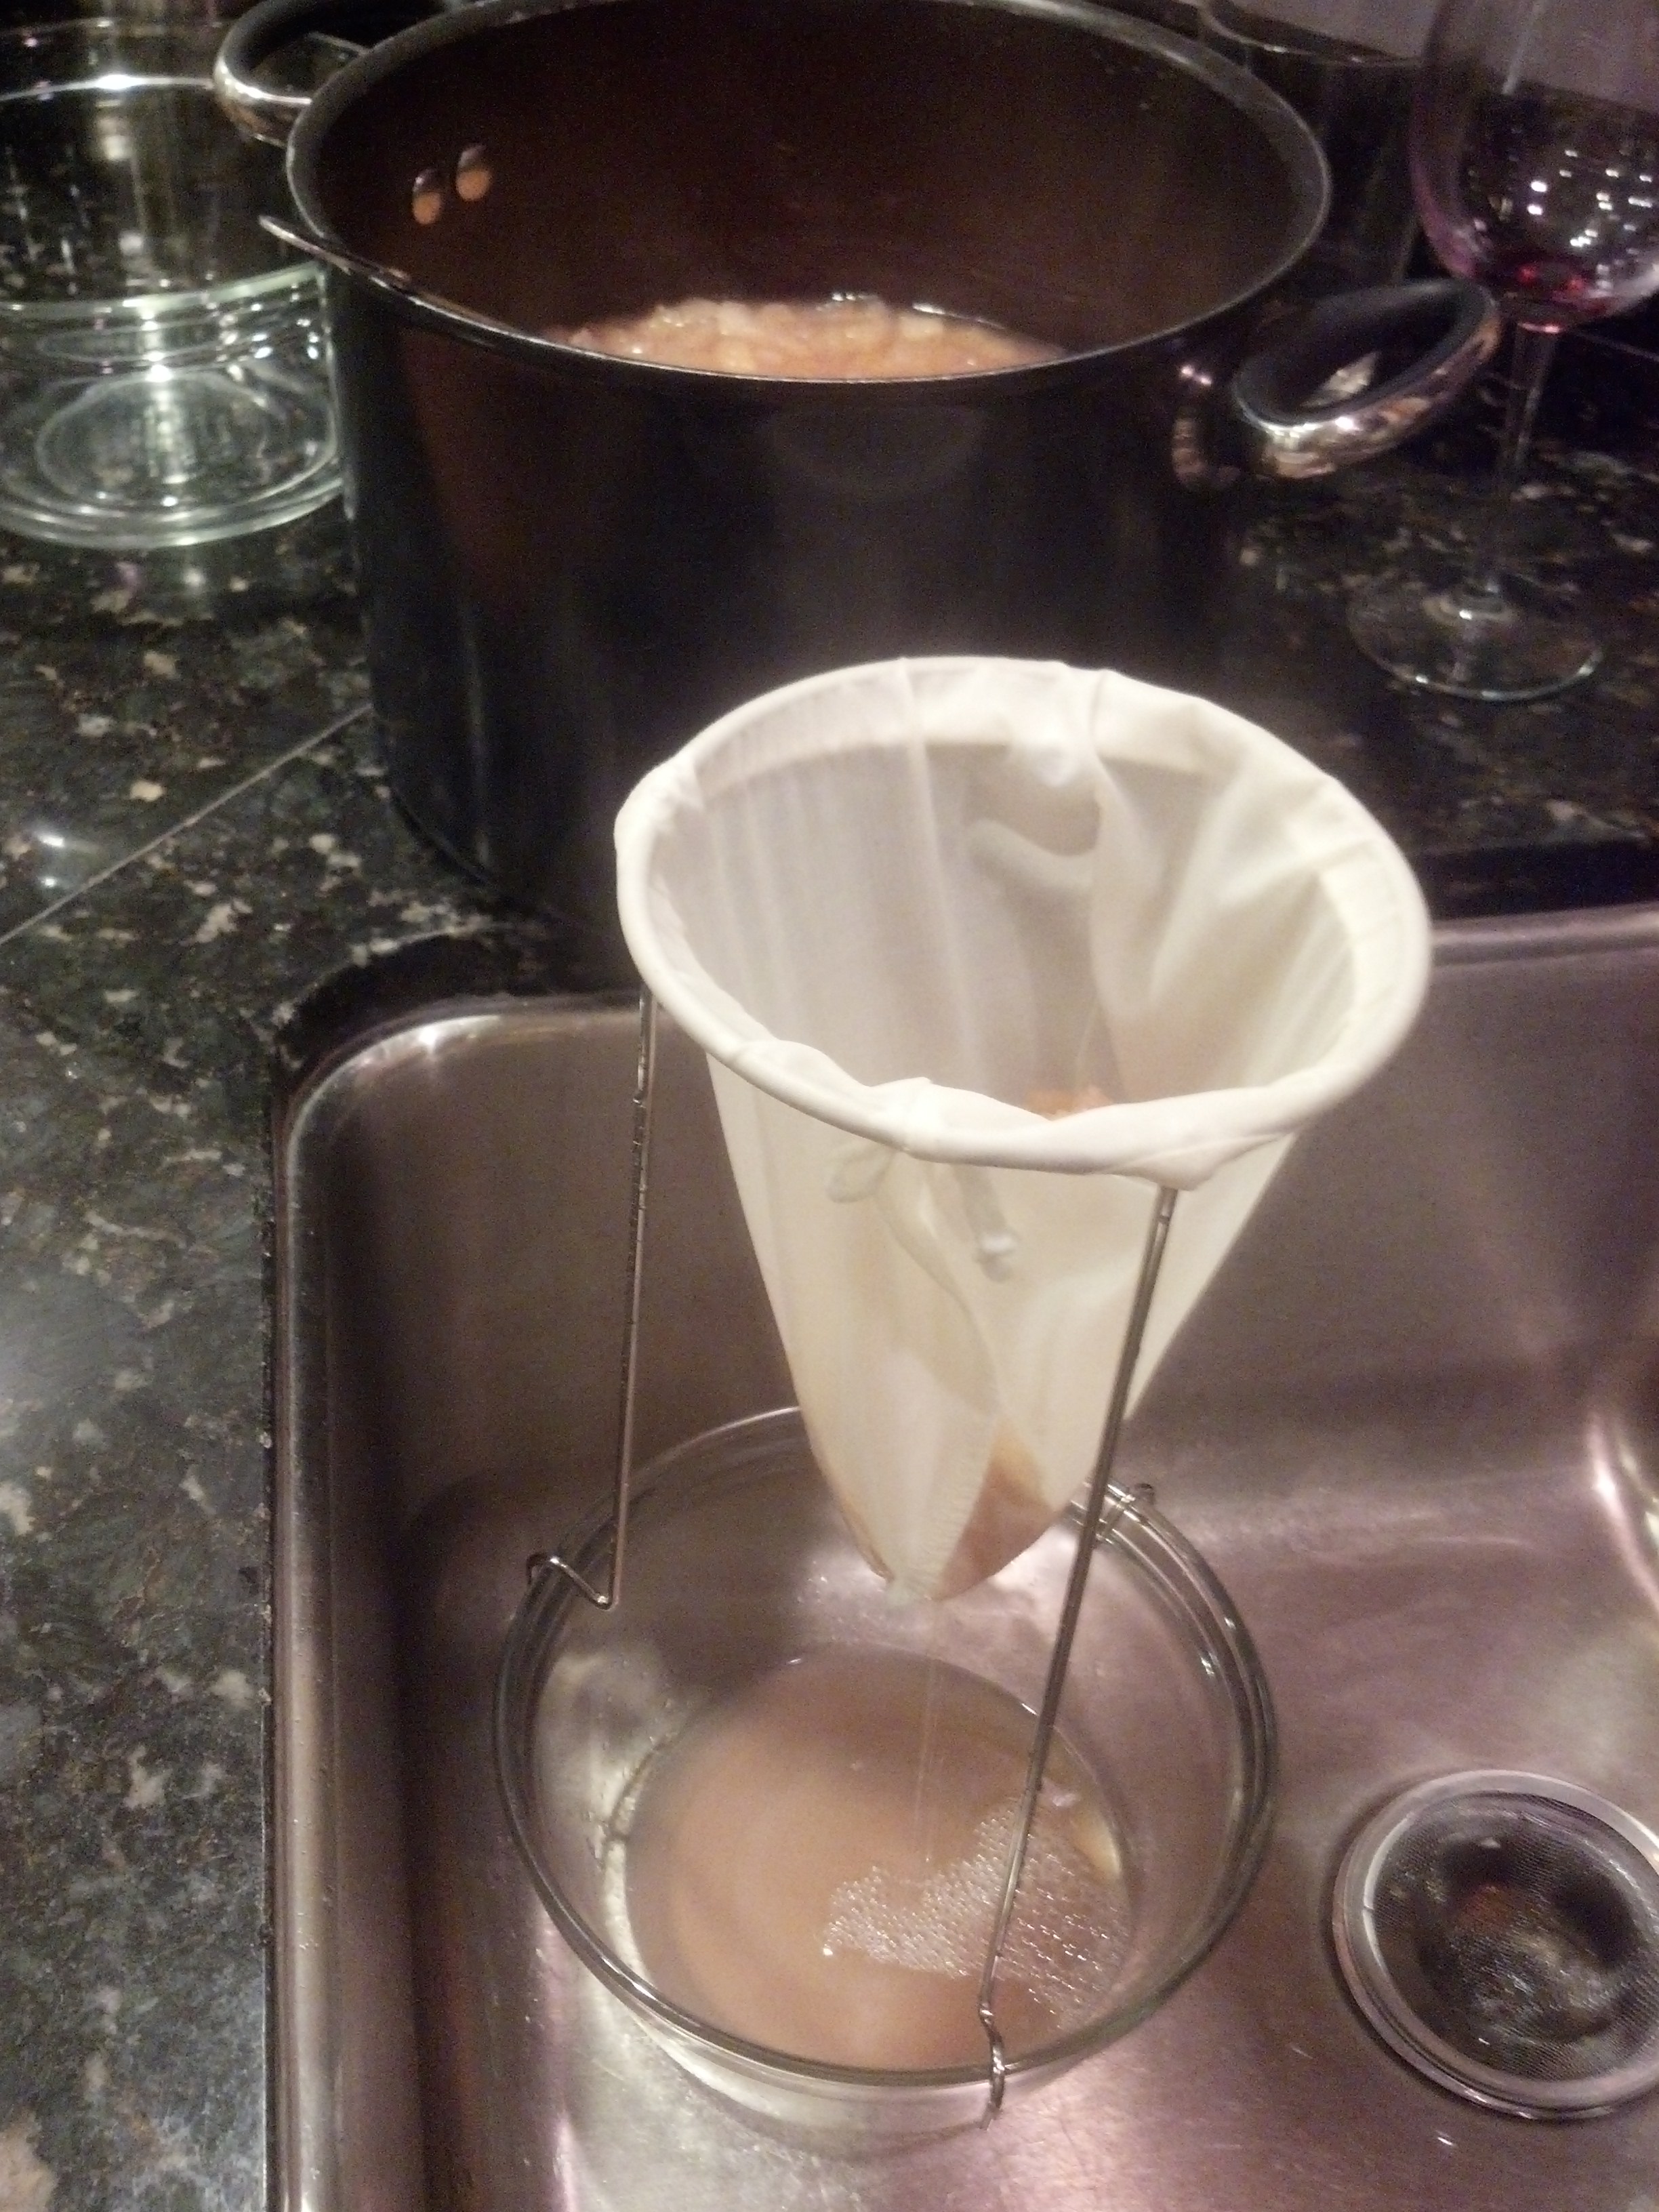
Pour the mixture into a dampened jelly bag or colander lined with dampened cheese cloth and let drain in the refrigerator (or, in my case, the screen porch as it was mid-30's) overnight.

note: it's tempting, but don't squeeze or press the bag; it'll make the resulting jelly cloudy

img_20141103_222348_640 img_20141103_222405_529

Step 4

Measure 1 quart of the resulting apple juice and add it to a large saucepan over high heat. Stir in the sugar and lemon juice.

img_20141104_192434_171

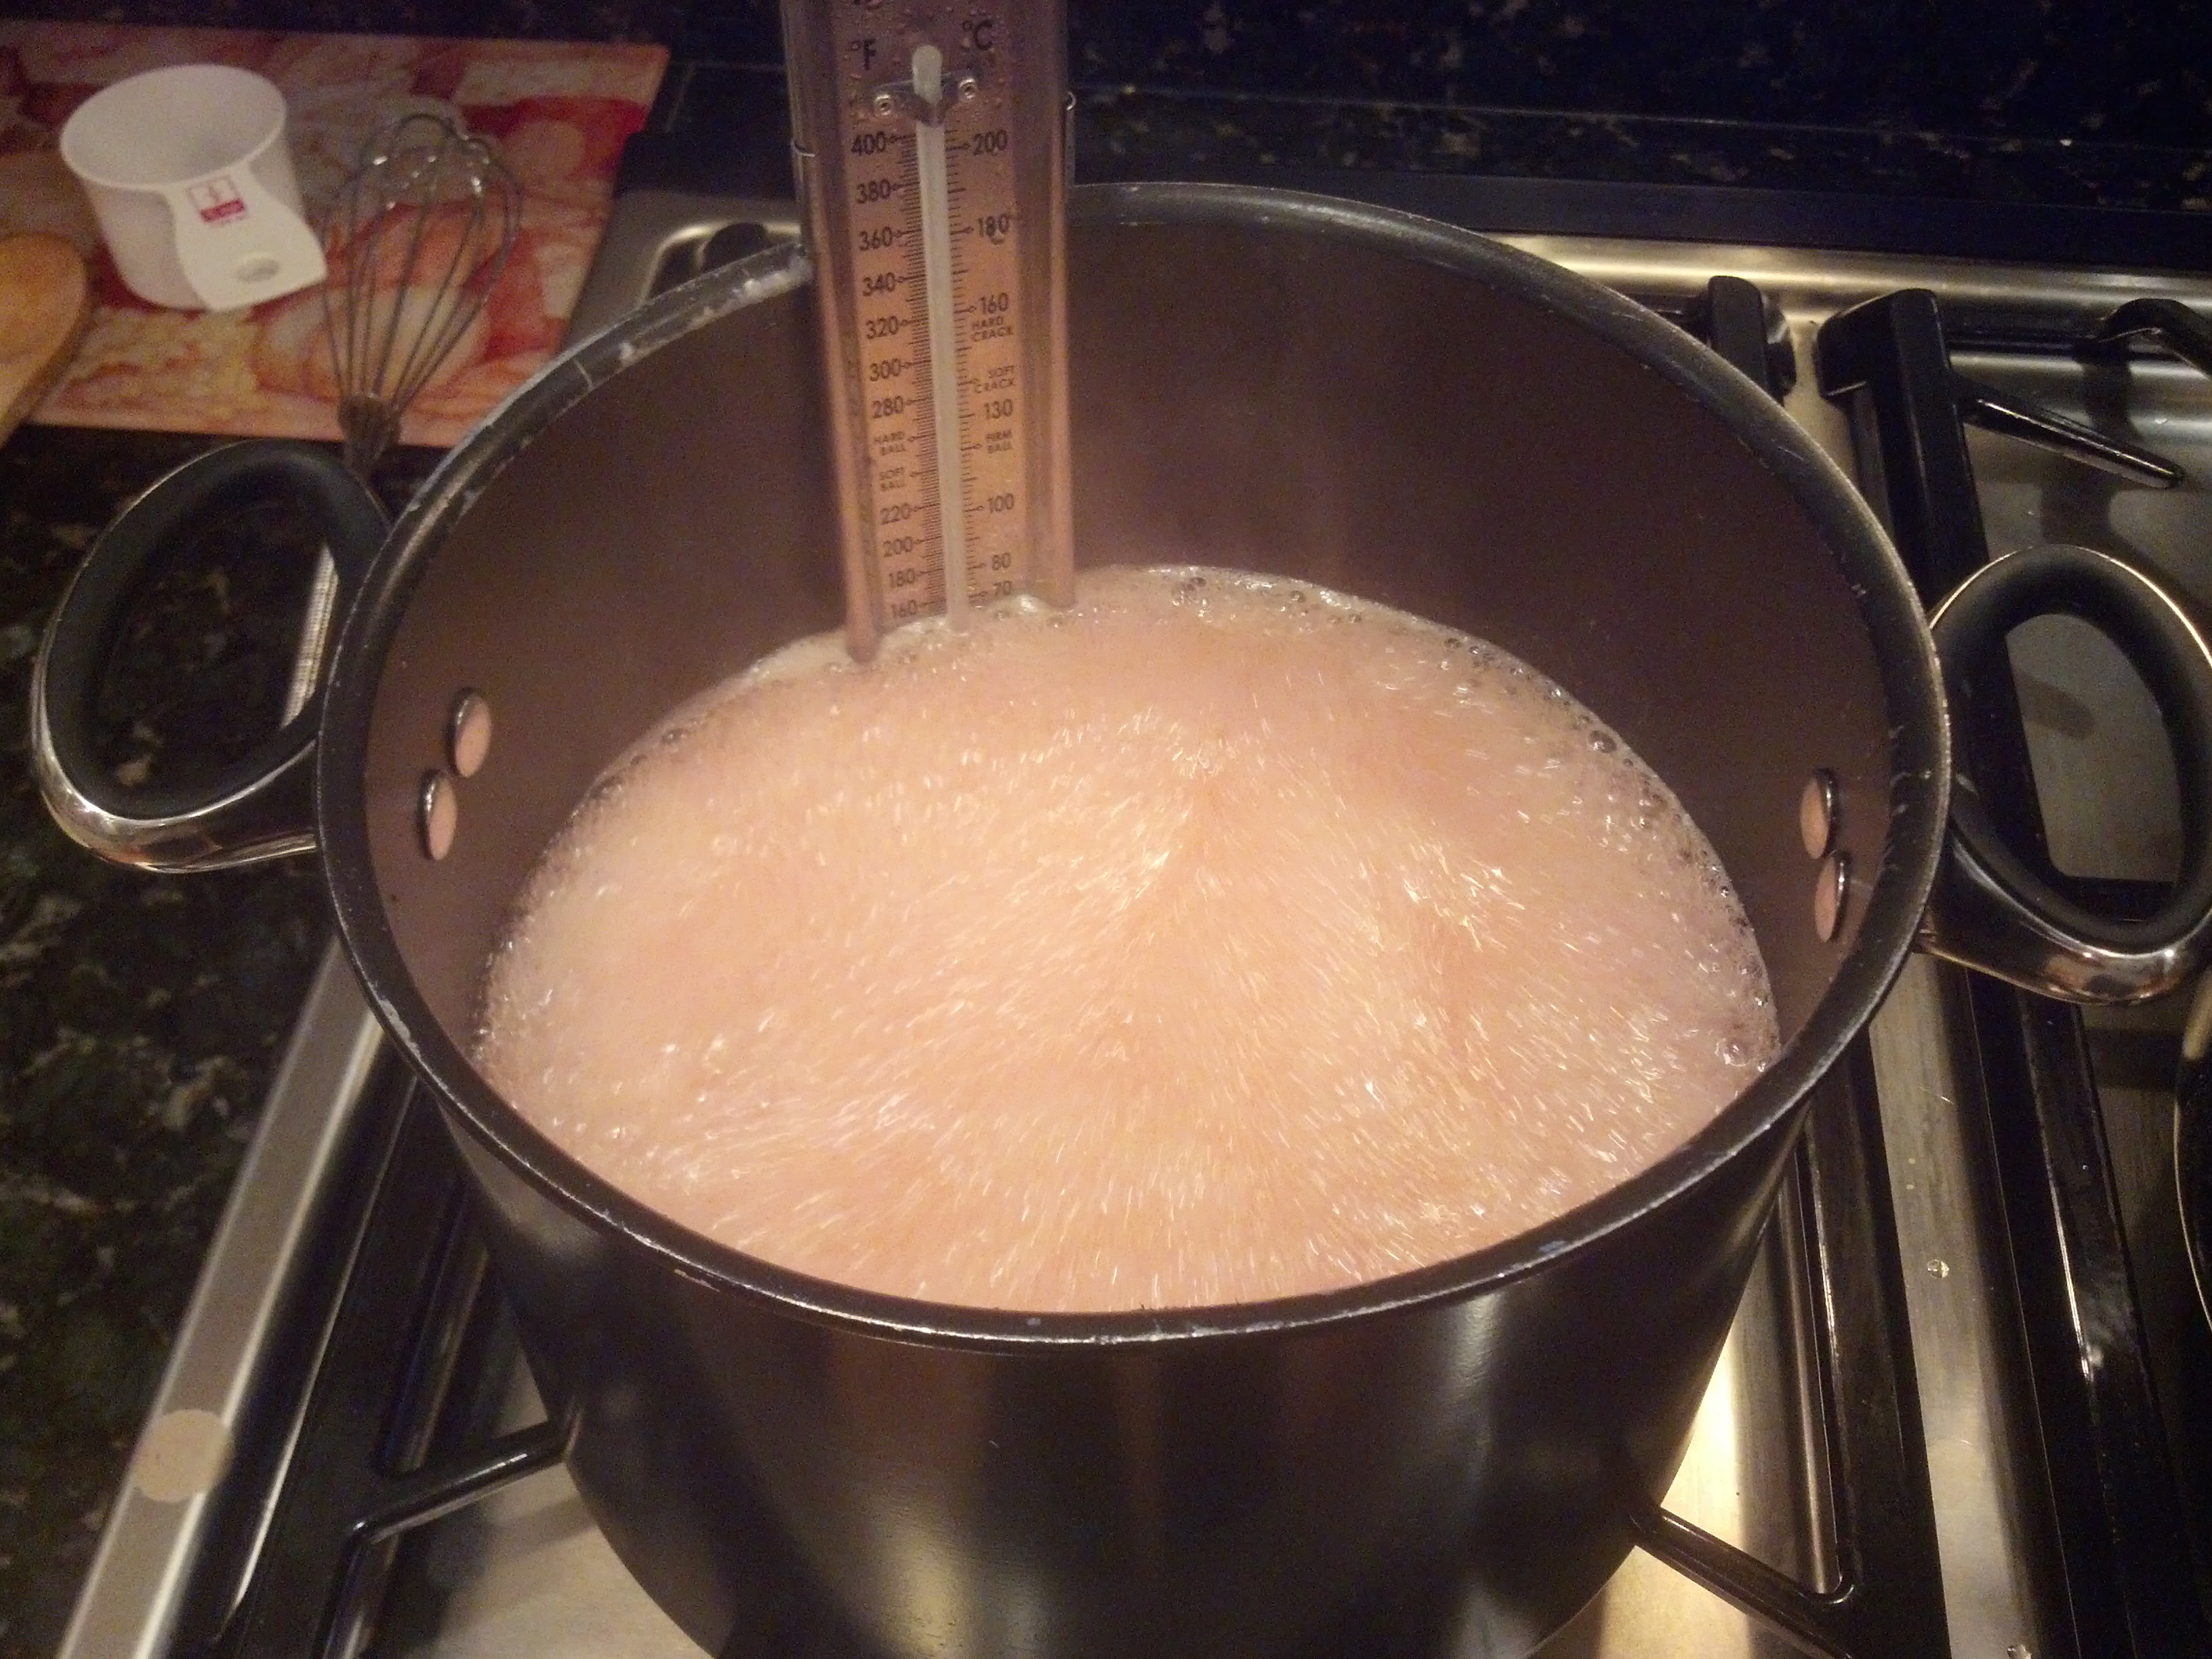
Bring to a full boil that cannot be stirred down. Continue to boil until the gel stage is reached. Remove from the heat.

Note: this was (is?) the trickiest part. although the jelly will taste fine no matter the viscosity, if you want it to hold like jelly instead of a sauce, you want it to set. I didn't use any additional pectin as apples are naturally high in the stuff... I digress - there's a few different ways to determine 'gel stage' including temperature, sheet/spoon method, or cold plate ... as you can see, I went with the thermometer.

img_20141104_191121_741

Apple jelly sets up quickly, so you have to be ready to transfer to your storage container in a hurry.

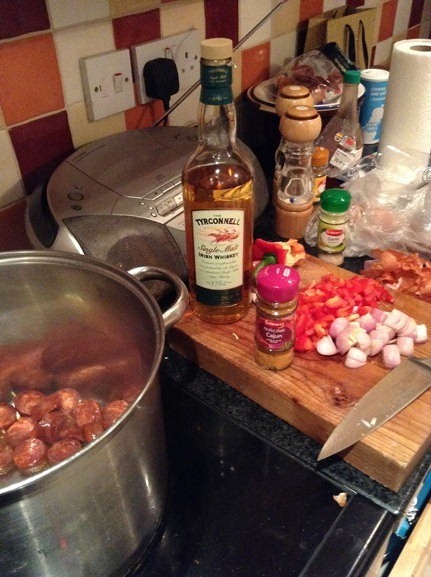
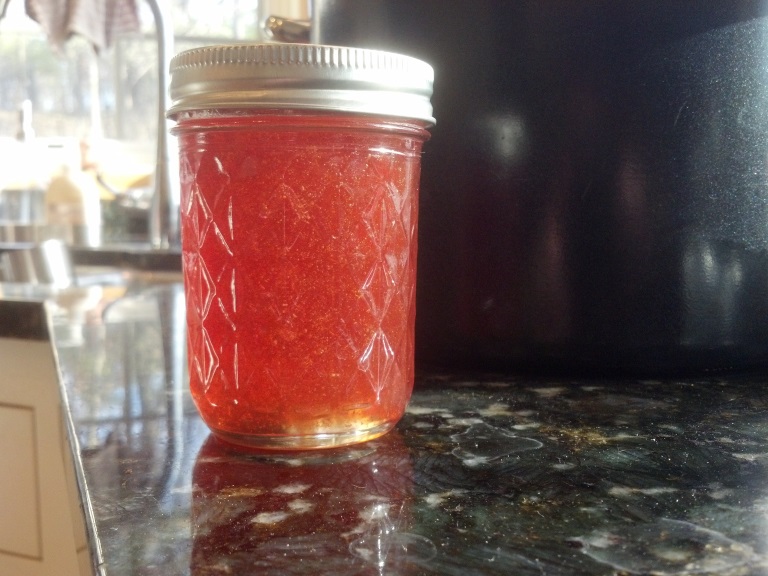
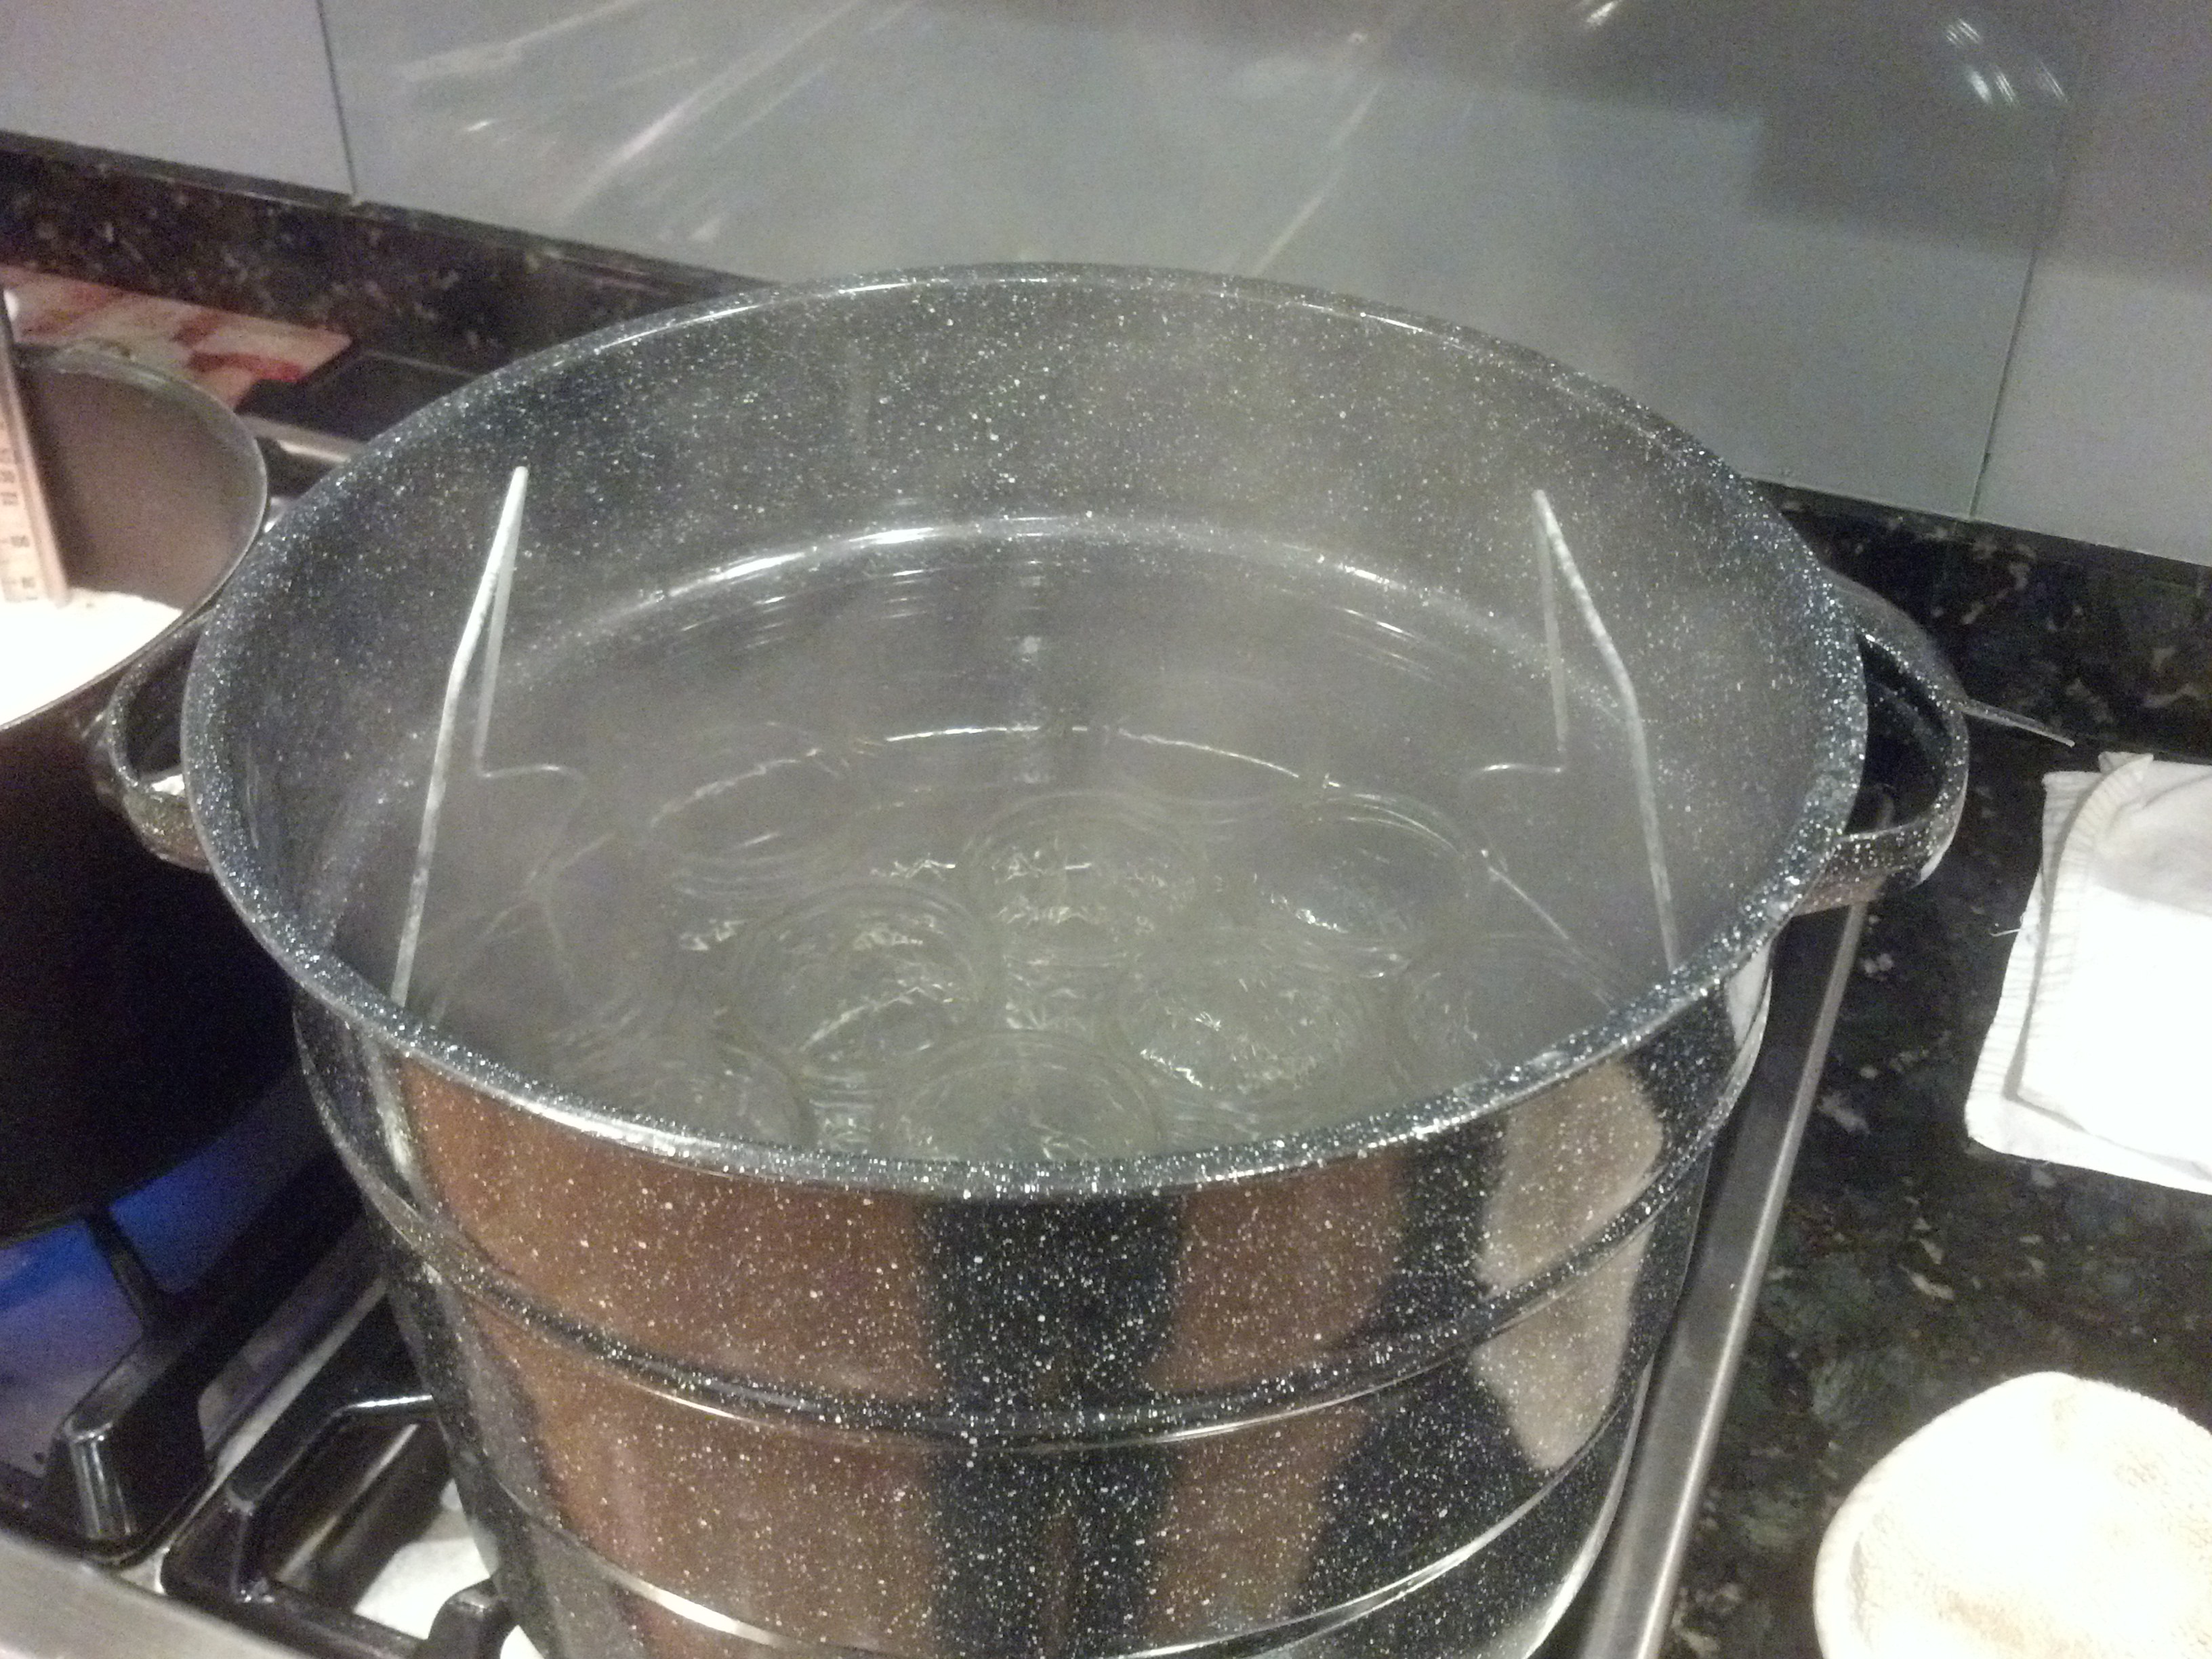
I chose to can the jelly (1+ year shelf life) rather than refrigerate it (up to 3 weeks). Unfortunately, I was moving so quickly with hot, sweet, sticky jelly that I didn't get any pictures of the process beyond this:

img_20141104_191217_016Step 5

Boiling Water Canning Method:

  • Ladle the jelly into clean, hot half-pint or pint canning jars, leaving 1/4 inch of headspace.
  • Release trapped air (wooden spoon handle or small rubber spatula) and wipe the rims clean.
  • Center lids on the jars and screw on jar bands.
  • Process (boil) for 10 minutes.
  • Turn off heat, remove canner lid, and let the jars rest in the water for approximately 5 minutes.
  • Remove the jars and set aside for 24 hours.
  • Check seals (lid should have sucked in - press up on the lid edge slightly with your thumb. It should not pop off easily).
  • Store in your cupboard for as long as it lasts* or give as gifts (being sure to ask for the jar back).

*I don't recall how long it lasted - ended up with 6-8 jars of jelly...but it was "my" jelly, so all the effort was not wasted.

Spookily Good Sugar Cookies

I intended to make these with Halloween-themed M&M's, but I didn't find any, so you're just going to have to pretend. One of my chief complaints about M&M cookies is that the candies are so sweet that the overall effect can be something that appeals only to those who are 10 and under. But this recipe is just the thing--not too sweet and the generous quantity of vanilla along with a hint of nutmeg give them a flavor I can only describe as perfect.

from The Essential Crunchy Sugar Cookie recipe in The King Arthur Flour Cookie Companion

1/4 cup (1 5/8 oz.) vegetable shortening
1/4 cup unsalted butter, softened (this is 1/2 stick, or 2 oz.)
2/3 cup (4 3/4 oz.) granulated sugar
1/2 cup (2 oz.) milk (not skim)
1 teaspoon white vinegar or cider vinegar
1 tablespoon vanilla extract (yes, a whole tablespoon)
1/4 teaspoon nutmeg (I grated my own with a microplane grater and used about 1/2 teaspoon just because it ends up being so fluffy)
2 cups (8 1/2 oz.) all-purpose flour
1/2 teaspoon baking soda
heaping 1/4 teaspoon salt
2 cups M&M's*
additional granulated sugar for tops of cookies

Preheat oven to 325°F. Line two baking sheets with parchment paper. (Alternatively, you can grease the baking sheets.)

Using a stand mixer (or sturdy electric hand mixer and a large bowl), cream shortening, butter, and sugar for approximately 3 minutes, until light and fluffy. Scrape down sides of bowl.

In a liquid measuring cup, stir together the milk, vinegar, and vanilla. Add this to the butter mixture, beating until well combined. The mixture will look curdled, but this is fine.

Add nutmeg, flour, baking soda, and salt while mixer is off. Start beating on slowest speed and gradually increase to medium-low, beating until the mixture forms a cohesive dough. Add M&M's and beat or stir until candies are evenly distributed throughout.

Use a cookie scoop, spoon, or your hands to form dough into 1.5-inch balls. Place about 2 inches apart on cookie sheets.

Using the bottom of a drinking glass dipped in sugar, flatten the balls to 1/4 inch thick.

Bake for 20 minutes, rotating sheets on top and bottom racks halfway through. When done, the cookies should be a light gold color and just beginning to brown around the bottom edges. Remove them from the oven and transfer to a wire rack to cool completely.

Store in an airtight plastic container or ziplock bag for up to 1 week.

*A "medium" bag of M&M's contains 1 3/4 cups, which works fine for this recipe, but if you spring for the "large" bag, you'll have a full 2 cups and some leftovers to much on, which may be either a positive or a negative depending on your perspective.

Taking It To The Limit Cassoulet

In the interest of expanding my waistline and hardening my arteries, I decided I would take a swing at making cassoulet, inspired by a recent NYT recipe. (as it happens, this is a topic that the NYT returns to again and again and again and again and again; apparently, they really want their readers to make cassoulet).

anyway, I had already purchased the ham hocks with a vague plan to make either split pea soup or navy bean soup, so I was part way there. I picked up a package of chicken legs (to make confit), a turnip, rutabaga, small can of tomato paste, a bucket o' lard, and a bag of Great Northern beans. The rest, I had on hand.

Chicken confit in process.

Step one was the confit.

I rubbed the chicken legs with a spice mixture vaguely in line with the recipe (ground cardamom, ground coriander, ground clove, ground nutmeg, paprika, cayenne, salt; I forgot the white pepper and the ground ginger) and settled them into my cast iron dutch oven (in which I'd melted about 2 lbs of lard) along with an unpeeled, whole head of garlic, a sprig of rosemary from the garden, and a few bay leaves. I had to top off with about a cup of olive oil because I had so many chicken legs (about 4 lbs worth).
This is a great technique, well worth trying. The chicken came out succulent and delicious, and I now have a quart of nicely flavored lard for frying potatoes and such. Also, the confit-ed garlic is the bomb.

Beans for cassoulet

Step two was to par-cook the beans.

I soaked them for an hour or so in 5 cups of water (brought to boil, then shut off) along with the ham hocks, which I didn't have room to confit the day before. I then added about three more cups of water, brought the pot back to a boil and lowered to a simmer. After skimming several times, I added a pinch of red pepper flakes, a half-tsp of white pepper (trying to make up for forgetting it with the confit), a half-tsp of dried thyme, a tsp of kosher salt, a couple of bay leaves, and 4-5 smushed cloves of garlic. I let this cook for about 45 minutes, until the beans were mostly done. I then removed the hocks and poured off almost all of the liquid and reserved it separately from the beans.

Sweated veggies for cassoulet

Step three was to render the bacon, brown the sausages, and sweat the veggies.

I rough-chopped about three strips of thick bacon and browned it in the cast iron pot, then browned the sausages (truth be told, I forgot this step and had to pause half-way through the sweat to do it). I then added, in large-ish dice, an onion, a couple ribs of celery, about 2/3 cup carrot, a medium turnip, a small rutabaga, a sprig of rosemary and about five cloves garlic (rough chopped). After these were fairly soft, I added a couple tbs of tomato paste, the beans, the garlic confit, and stirred in about 3 cups of the reserved bean water.

Meats (ham hock, bacon, garlic sausages, chicken confit) for cassoulet.

Lastly, I added a bit of the reserved gelatin from the confit-ed chicken and layered on the meats. A lot of meats.

This is not a low-calorie dish.

Into the oven at 350 for 45 minutes covered, then 20 minutes uncovered and, lastly, I cranked the heat to 425, turned on the convection fan, and let it go another 20 minutes.
The finished product.

It smells great, but looks a little wet. This recipe mocked the use of bread crumbs for the topping, so I left them out.

Post-prandial assessment: It was really good. A bit wetter than I wanted, but excellent flavor and richness. The mouthfeel was not fatty, so the Mrs. did not get grossed out. The beans were creamy, the broth flavorful (could have used even more garlic!), and the meats were meaty. It was a really, really, really good, fancy bean soup/stew. Maybe a lot of work for the result, but fun to try.

Pumpkin Waffles

As I always say, when all else fails . . . make waffles. Actually, I never say that. But these are tasty enough to make a bad day tolerable and a good day better.

1 7/8 cups (8 oz.) all-purpose flour
2 cups (8 oz.) white whole wheat flour
1/2 cup (4 oz.) packed light brown sugar
3 3/8 teaspoons baking powder
1 1/2 teaspoons baking soda
3/4 teaspoon salt
3 teaspoons ground cinnamon
1 1/2 teaspoons ground ginger
heaping 1/4 teaspoon ground cloves
6 large eggs
1 1/2 cups whole milk
1 1/2 cups buttermilk
1 15-oz. can solid-pack pumpkin
9 tablespoons (4.5 oz) unsalted butter, melted and slightly cooled
vegetable oil spray for waffle iron
maple syrup

Preheat oven to 250°F and preheat waffle iron.

In a medium bowl, combine flours, brown sugar, baking powder, baking soda, salt, cinnamon, ginger, and cloves.

In a large bowl, whisk eggs until blended. Then whisk in milk, buttermilk, pumpkin, and butter until smooth. Add dry ingredients to wet ingredients and mix with a rubber spatula just until smooth. (Note: my batter had a few lumps, and this did not seem to be a problem.)

waffle batter

Spray a light coat of vegetable oil onto waffle iron (mine is nonstick, so I did't need much). Using a ladle, pour batter onto waffle iron. Cook according to manufacturer’s instructions. I can never manage to fill the waffle iron the right amount to get full-sized waffles without also ending up with batter spilling out the sides, but perhaps you’re more skilled than I am or own a better waffle iron.

fully baked

When waffles are lightly browned, transfer them to a cooling rack positioned over a cookie sheet in the oven. This is an important step; it allows them to become crisp. You want to give them about 5 minutes in the oven, though longer is fine too if you want to make all the waffles first and then serve them.

Continue making the rest of the waffles. Serve with butter and maple syrup.

NOTES: Recipe source here. I basically multiplied the ingredients by 1.5 and ended up with 20 waffles. Check out that link if you want to end up with a less ridiculous quantity. I just freeze what we don’t eat. To reheat frozen waffles, defrost in the microwave and finish in the toaster.

Chocolate Chip Peanut Butter Pretzel Cookies

I have just one problem with these cookies—I can’t stop eating them.

1/2 cup unsalted butter, softened (1 stick)
1/4 cup (2.375 oz.) natural peanut butter, room temperature
1/2 cup (4 oz.) brown sugar, packed
1/4 cup (1.75 oz.) granulated sugar
1 large egg
2 teaspoons vanilla extract
1 1/3 cups (5.625 oz.) all-purpose flour [OR 2.5 oz. white whole wheat and the remainder all-purpose]
1 teaspoon cornstarch
1/2 teaspoon baking soda
generous 1/4 teaspoon salt [OR scant 1/2 teaspoon, depending on your preference]
1 generous cup mini pretzel twists
1 cup semi-sweet chocolate chips

Using a stand mixer (or sturdy electric hand mixer and a large bowl), cream butter, peanut butter, brown sugar, and granulated sugar, beating on medium speed for approximately 3 minutes, until light and fluffy. Scrape down sides of bowl. Add egg and vanilla and beat for 1 minute.

Add flour, cornstarch, baking soda, and salt while mixer is off. Start beating on slowest speed and gradually increase to medium. Beat until just combined and no more flour is visible, about 1 minute.

Add pretzels and chocolate chips, beating on low speed until combined. (This step will crush the pretzels.)

Slap some plastic wrap over the mixing bowl (or transfer to a smaller container with a lid) and refrigerate at least 1 hour and up to 24 hours.

When your chosen interval of time has passed, preheat oven to 350°F. Line cookie sheets with parchment paper.

Use a cookie scoop, spoon, or your hands to form dough into 1.5-inch mounds. Place about 2 inches apart on parchment-lined cookie sheets.

ready to bake

Bake for 10-12 minutes, rotating sheets on top and bottom racks halfway through. When done, the tops of the cookies should be barely set. Not to worry—they’ll bake a bit more as they cool. The finished cookies will be fairly soft.

Let sit on cookie sheet for 5-10 minutes (these are too fragile to transfer just out of the oven), then transfer to a wire rack to cool completely.

Store in an airtight plastic container or ziplock bag for up to 1 week.

NOTES: If you’re using peanut butter with salt, I’d probably go with the lower amount of salt. I had only light brown sugar on hand, but I definitely want to try to these cookies with dark brown sugar—this one in particular. The recipe makes about 2 dozen cookies, but it can be easily doubled. Recipe adapted from here.

The Nation Has An Appetite: Ratatouille

Per the earlier discussion, I'm going to describe how I make ratatouille here. Truth be told, I had never known the dish until some recipe showed up on some site someday telling me how to do it this way. So maybe this isn't even real ratatouille? Whatever you want to call it, it's delicious.

Also, sorry I don't have any pictures. The vegetables haven't been in season, so it hasn't been made for a while.

Ok, fine, here's a picture.

Spoiler SelectShow

And with that...

1 eggplant
1 zucchini (we often use more)
1 summer squash
1 large onion (I prefer more)
Enough tomatoes to cover the entire dish liberally
Other veggies as desired (peppers, for example)

1 garlic clove, minced
1/4 cup olive oil
Fresh basil leaves, torn or cut into 1-inch pieces
Thyme, Oregano, other traditional spices as desired (I'm going to use Herbs de Provence the next time I make this)
Salt & pepper to taste
Red wine vinegar, to taste

Eggs
Italian cheese blend (or other cheese that you prefer)
French bread, sliced.

Chop the vegetables into 1-inch or smaller pieces. Tomatoes should be seeded and given a fine dice. Toss together in a large baking dish, with olive oil, garlic, salt, pepper, thyme, etc. Bake at 400°F for 45 minutes, or so. Make sure they don't roast too quickly. Remove the vegetables from the oven, and add the basil and vinegar. Stir, then spoon out small cavities into which you will crack the eggs. I usually heap as many eggs into the pan as I can fit. Cover with cheese (I always add too much, but "mmmmmmm...cheese."), and place back into the oven, until eggs achieve desired doneness. Spoon over slices of french bread to serve.